
Image Processing
Astrophotography does not end when I pack up the gear and head inside. Much of the image takes shape after the camera stops collecting light. I often spend more time processing than planning or setting up, combining technical corrections with creative decisions to reveal what is hidden in a dark raw frame.
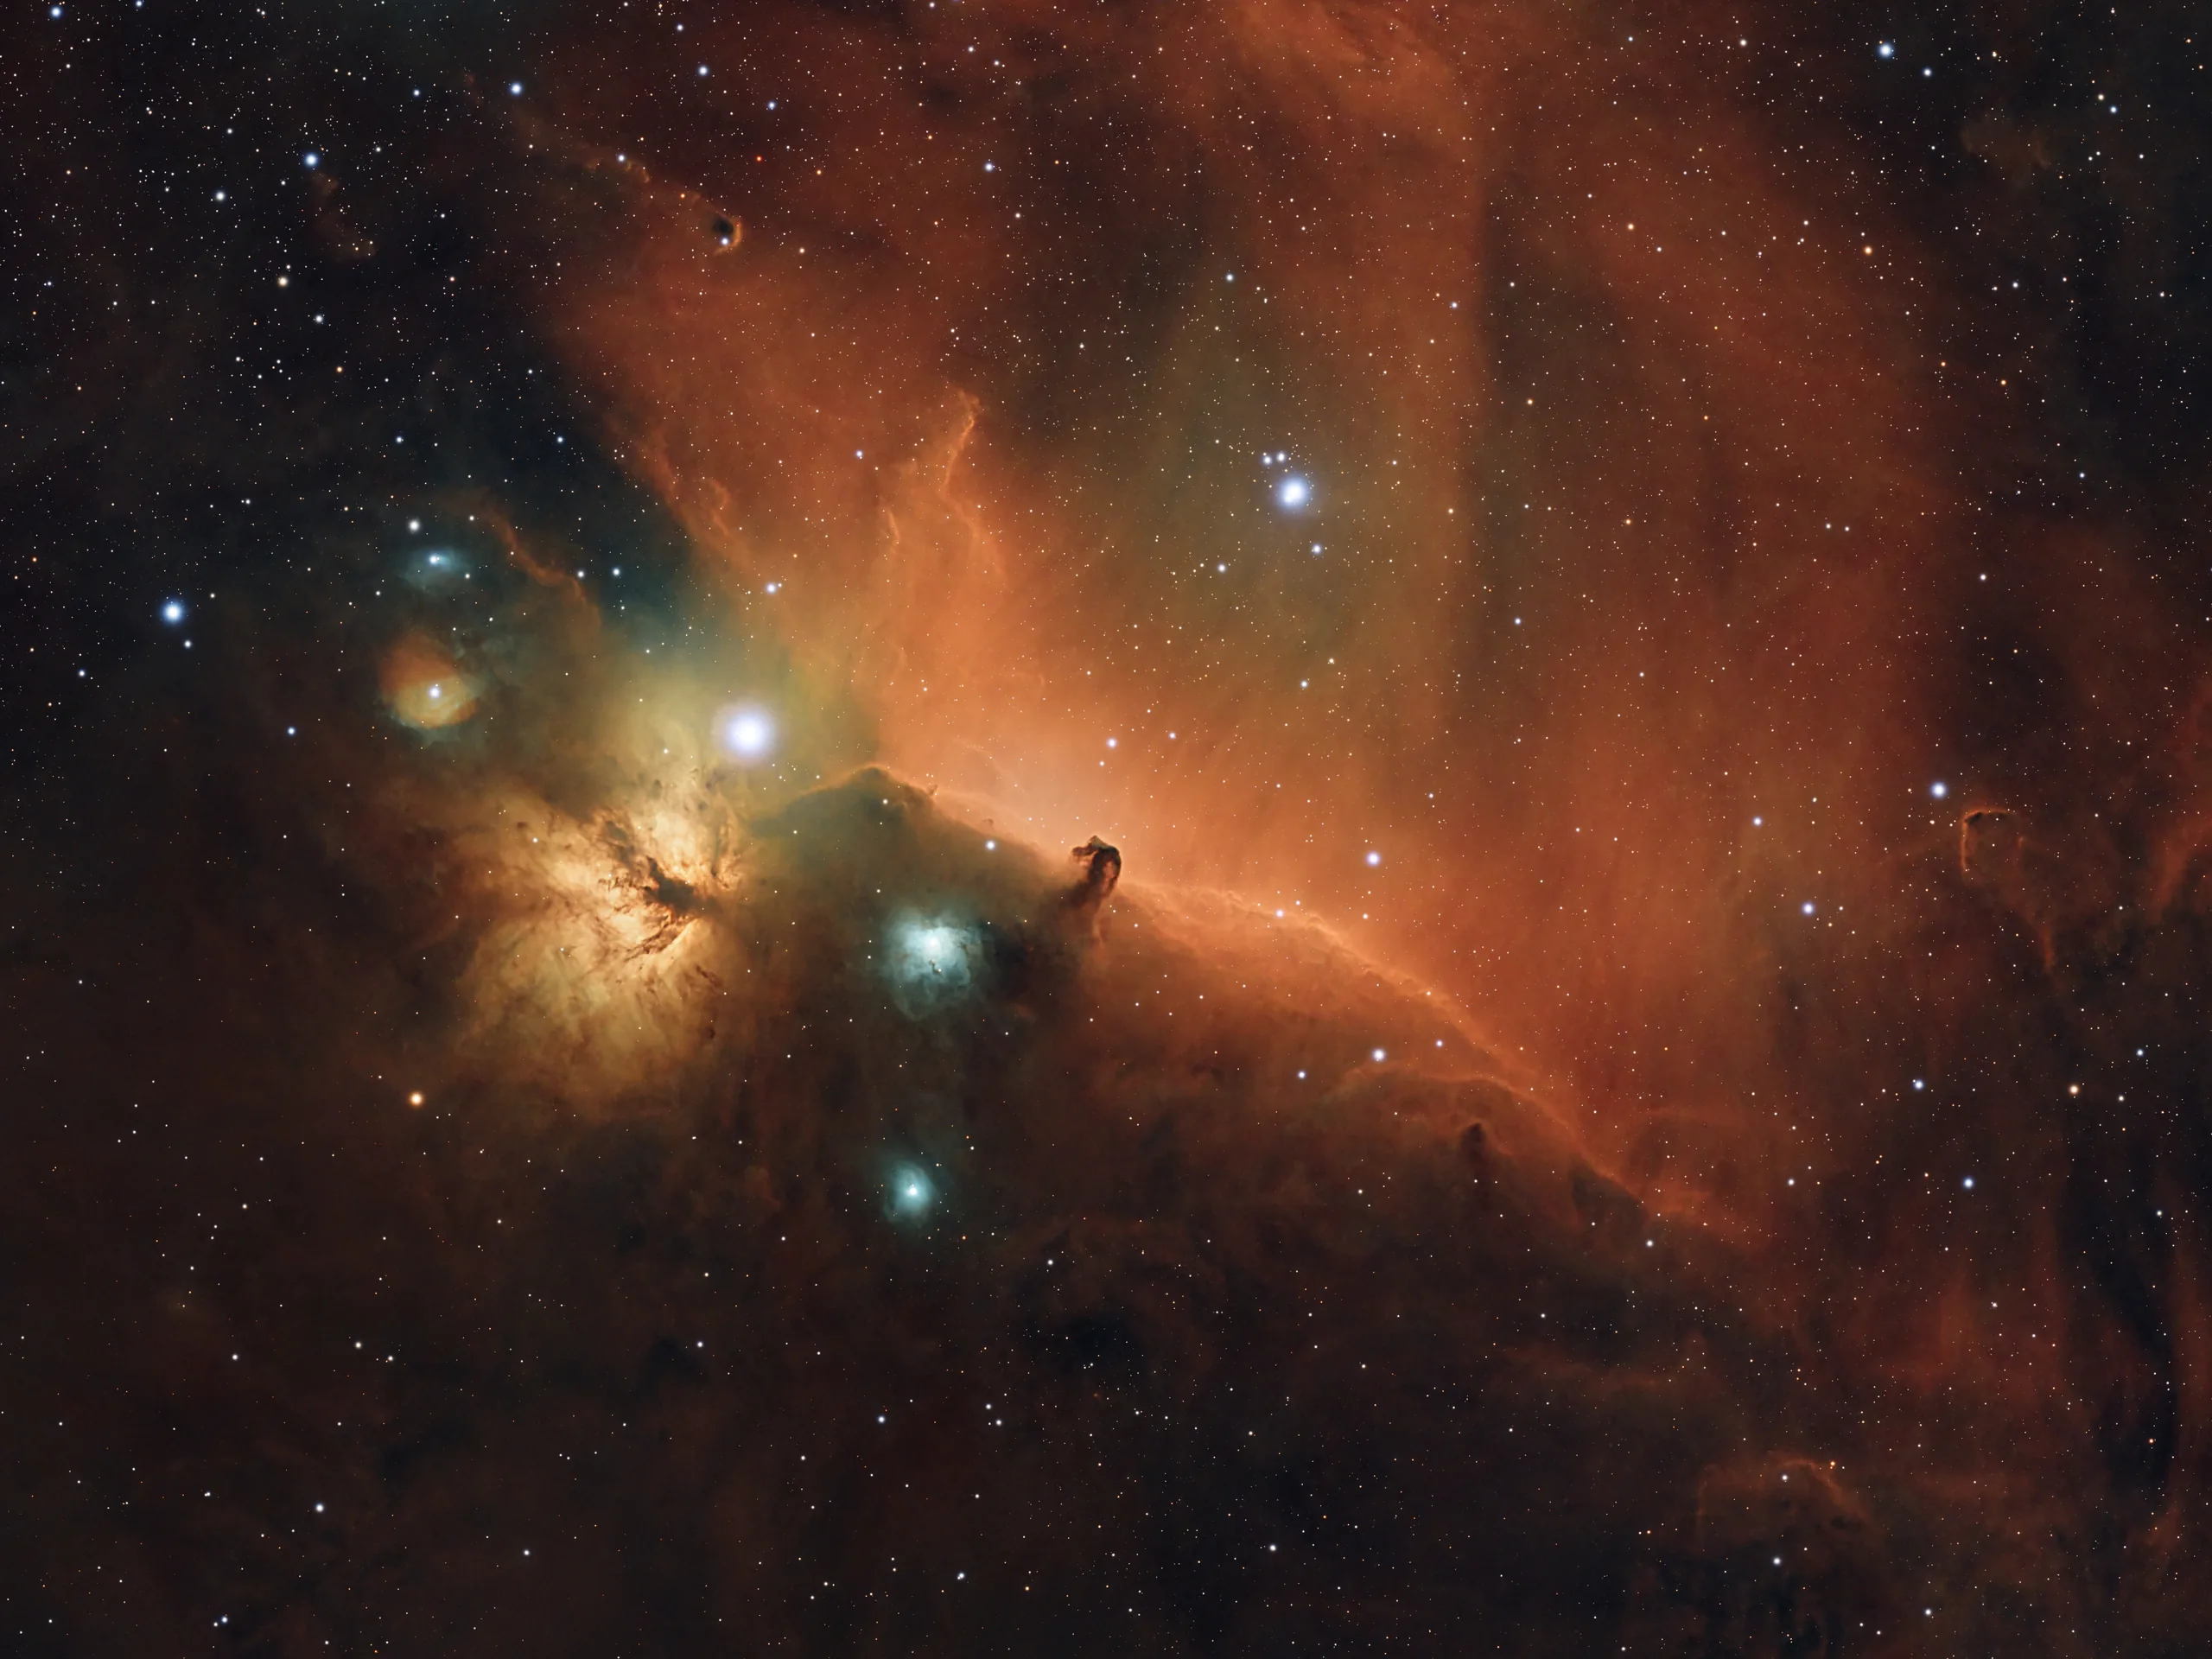
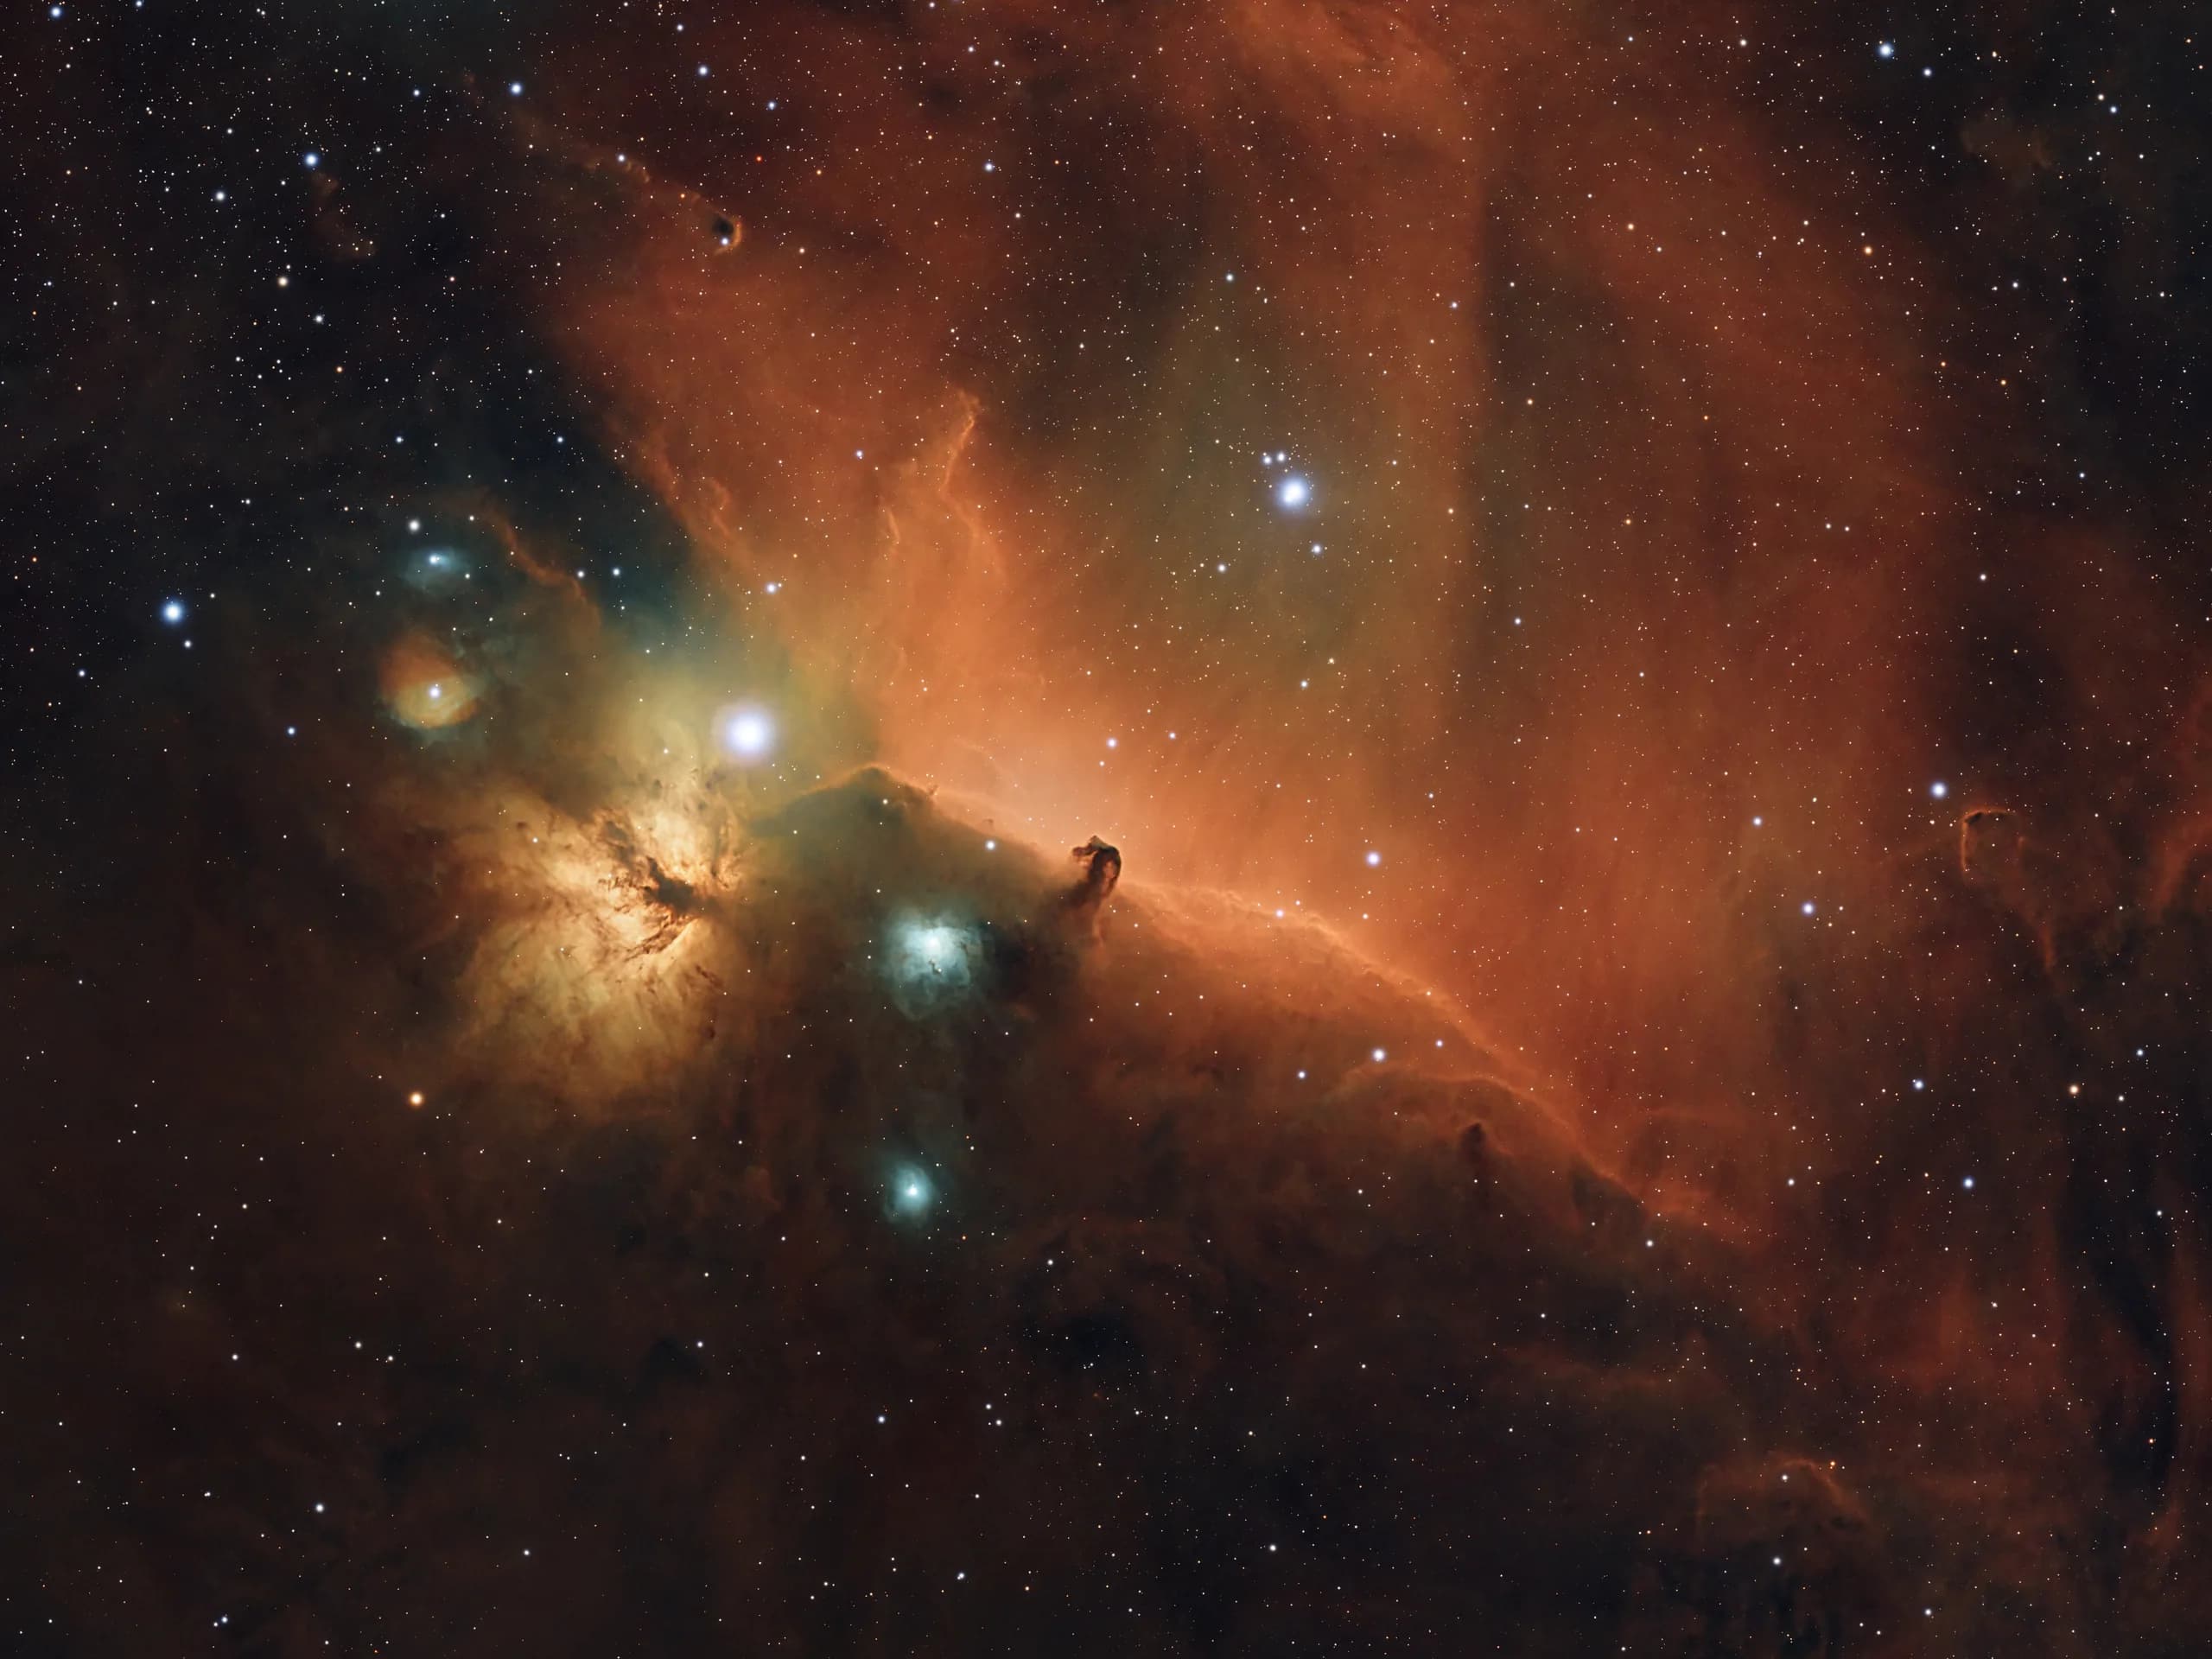
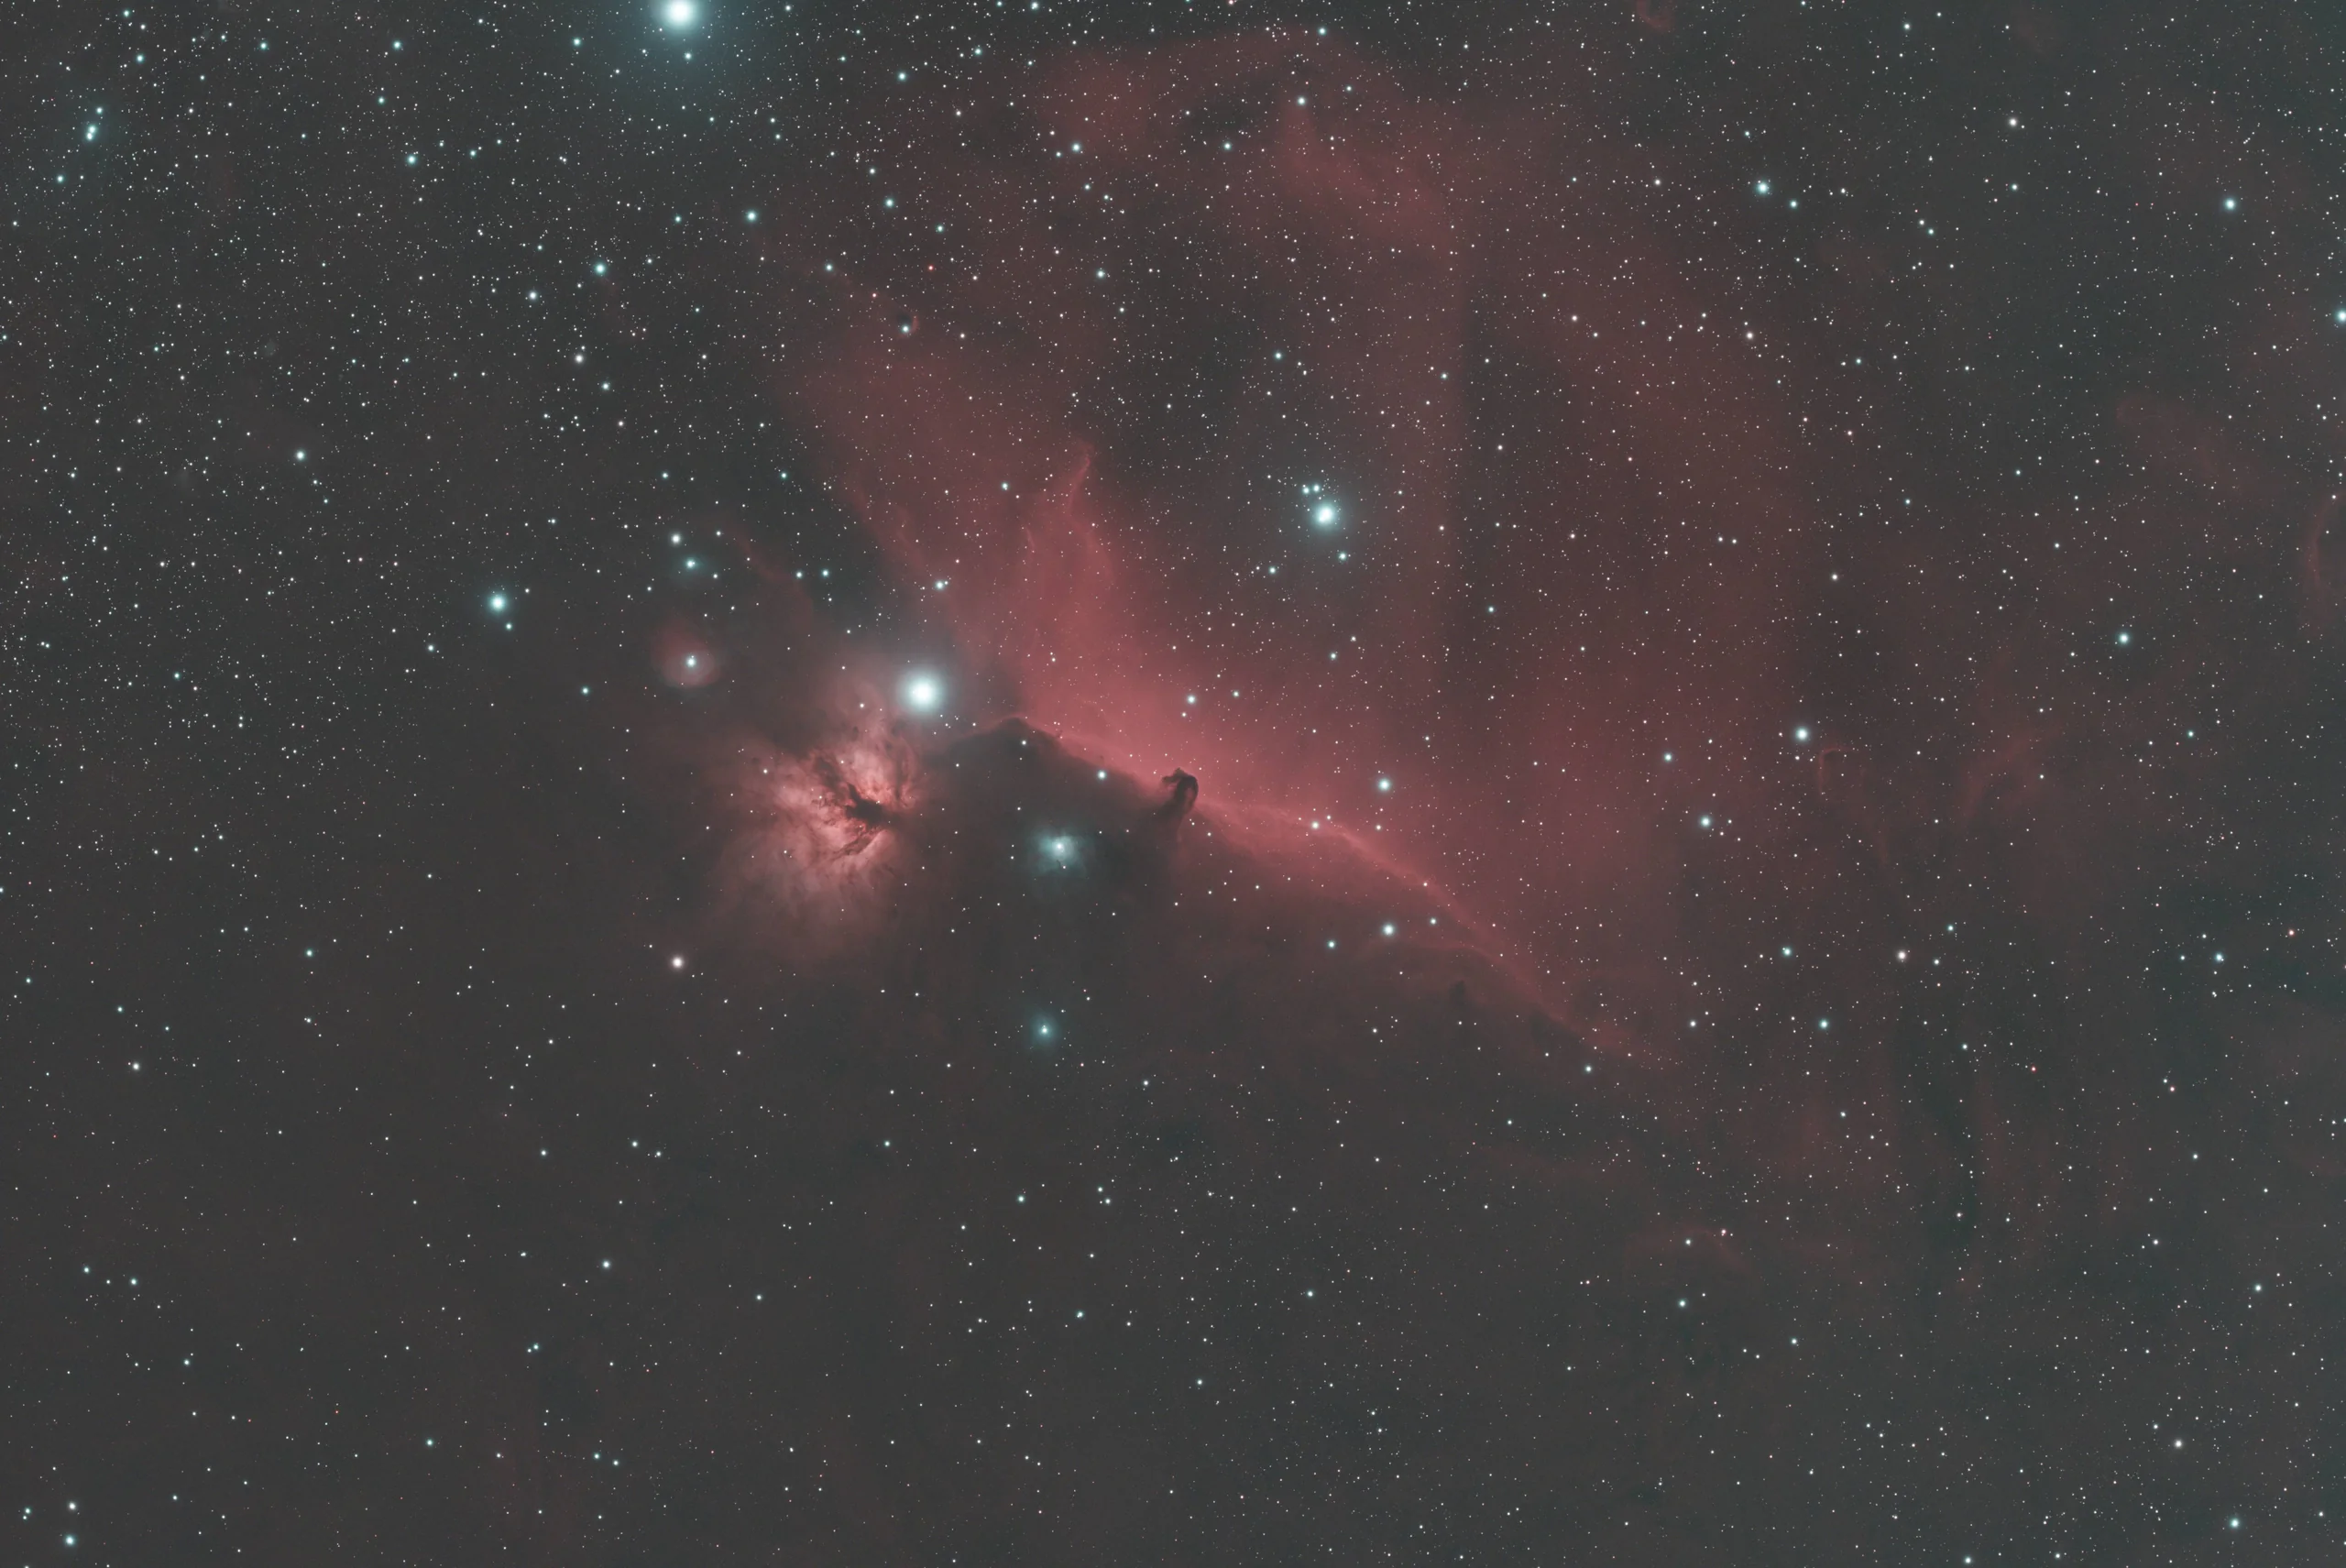
 RawFinal
Stretching
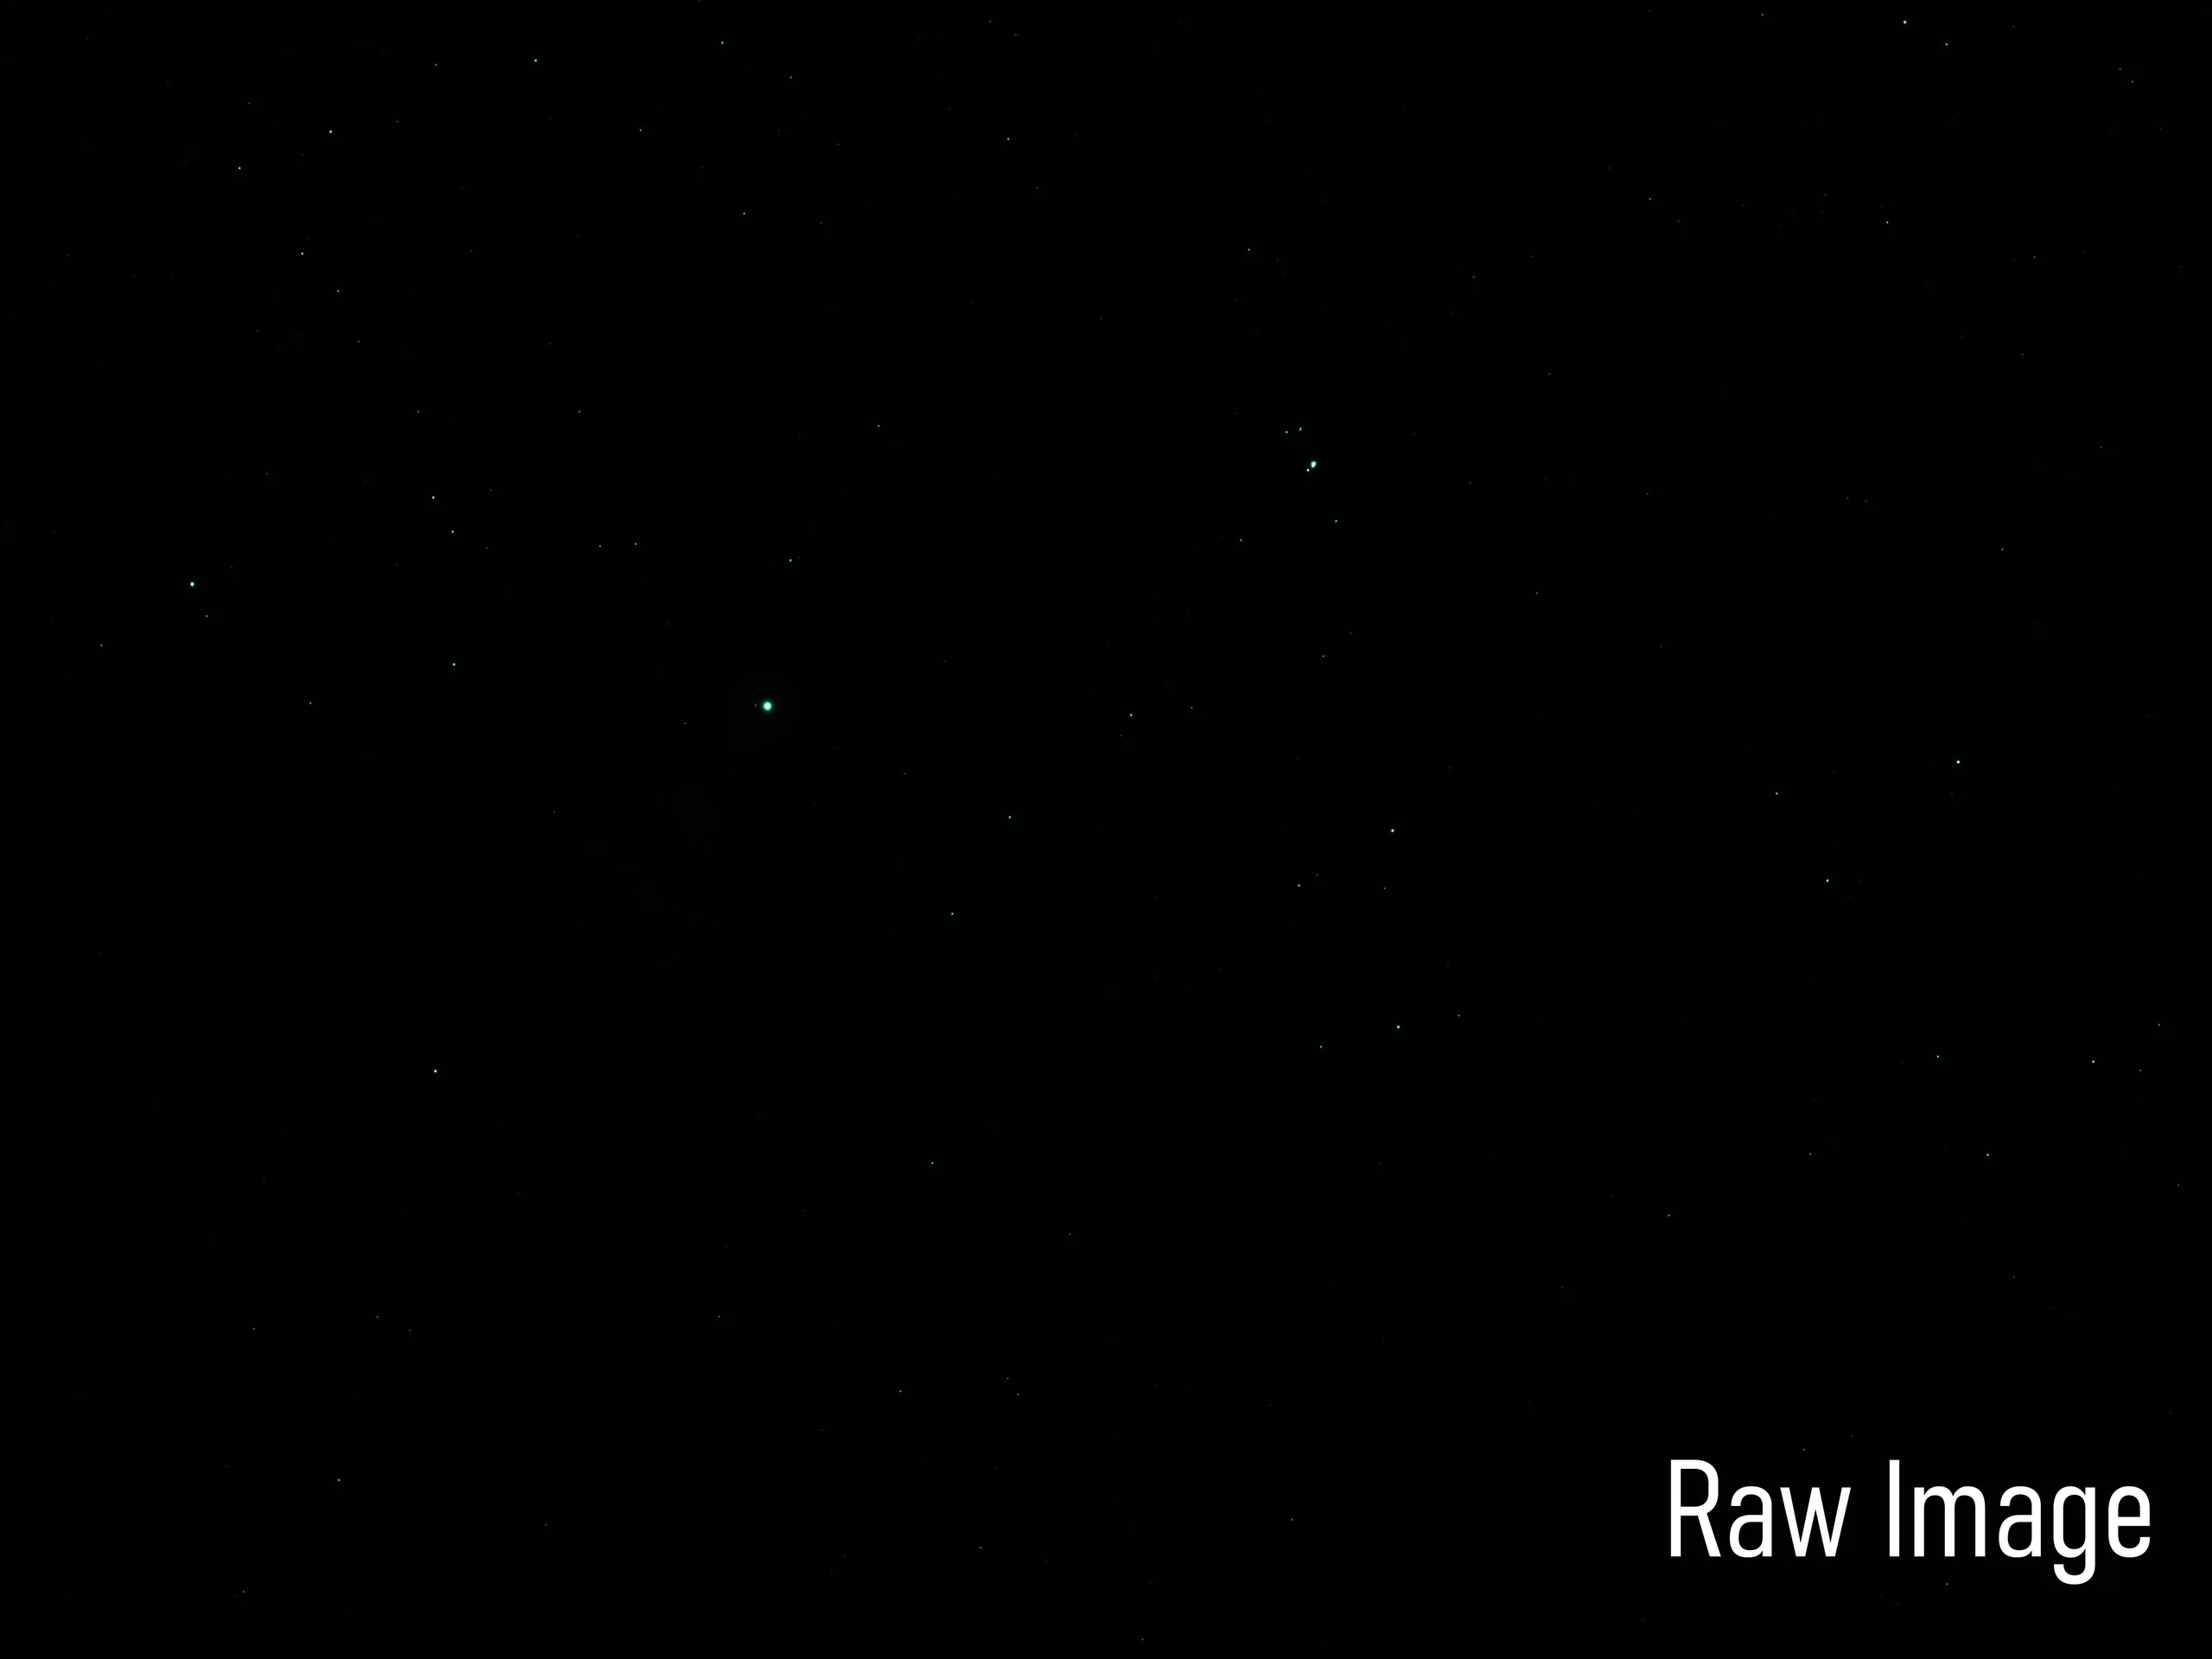
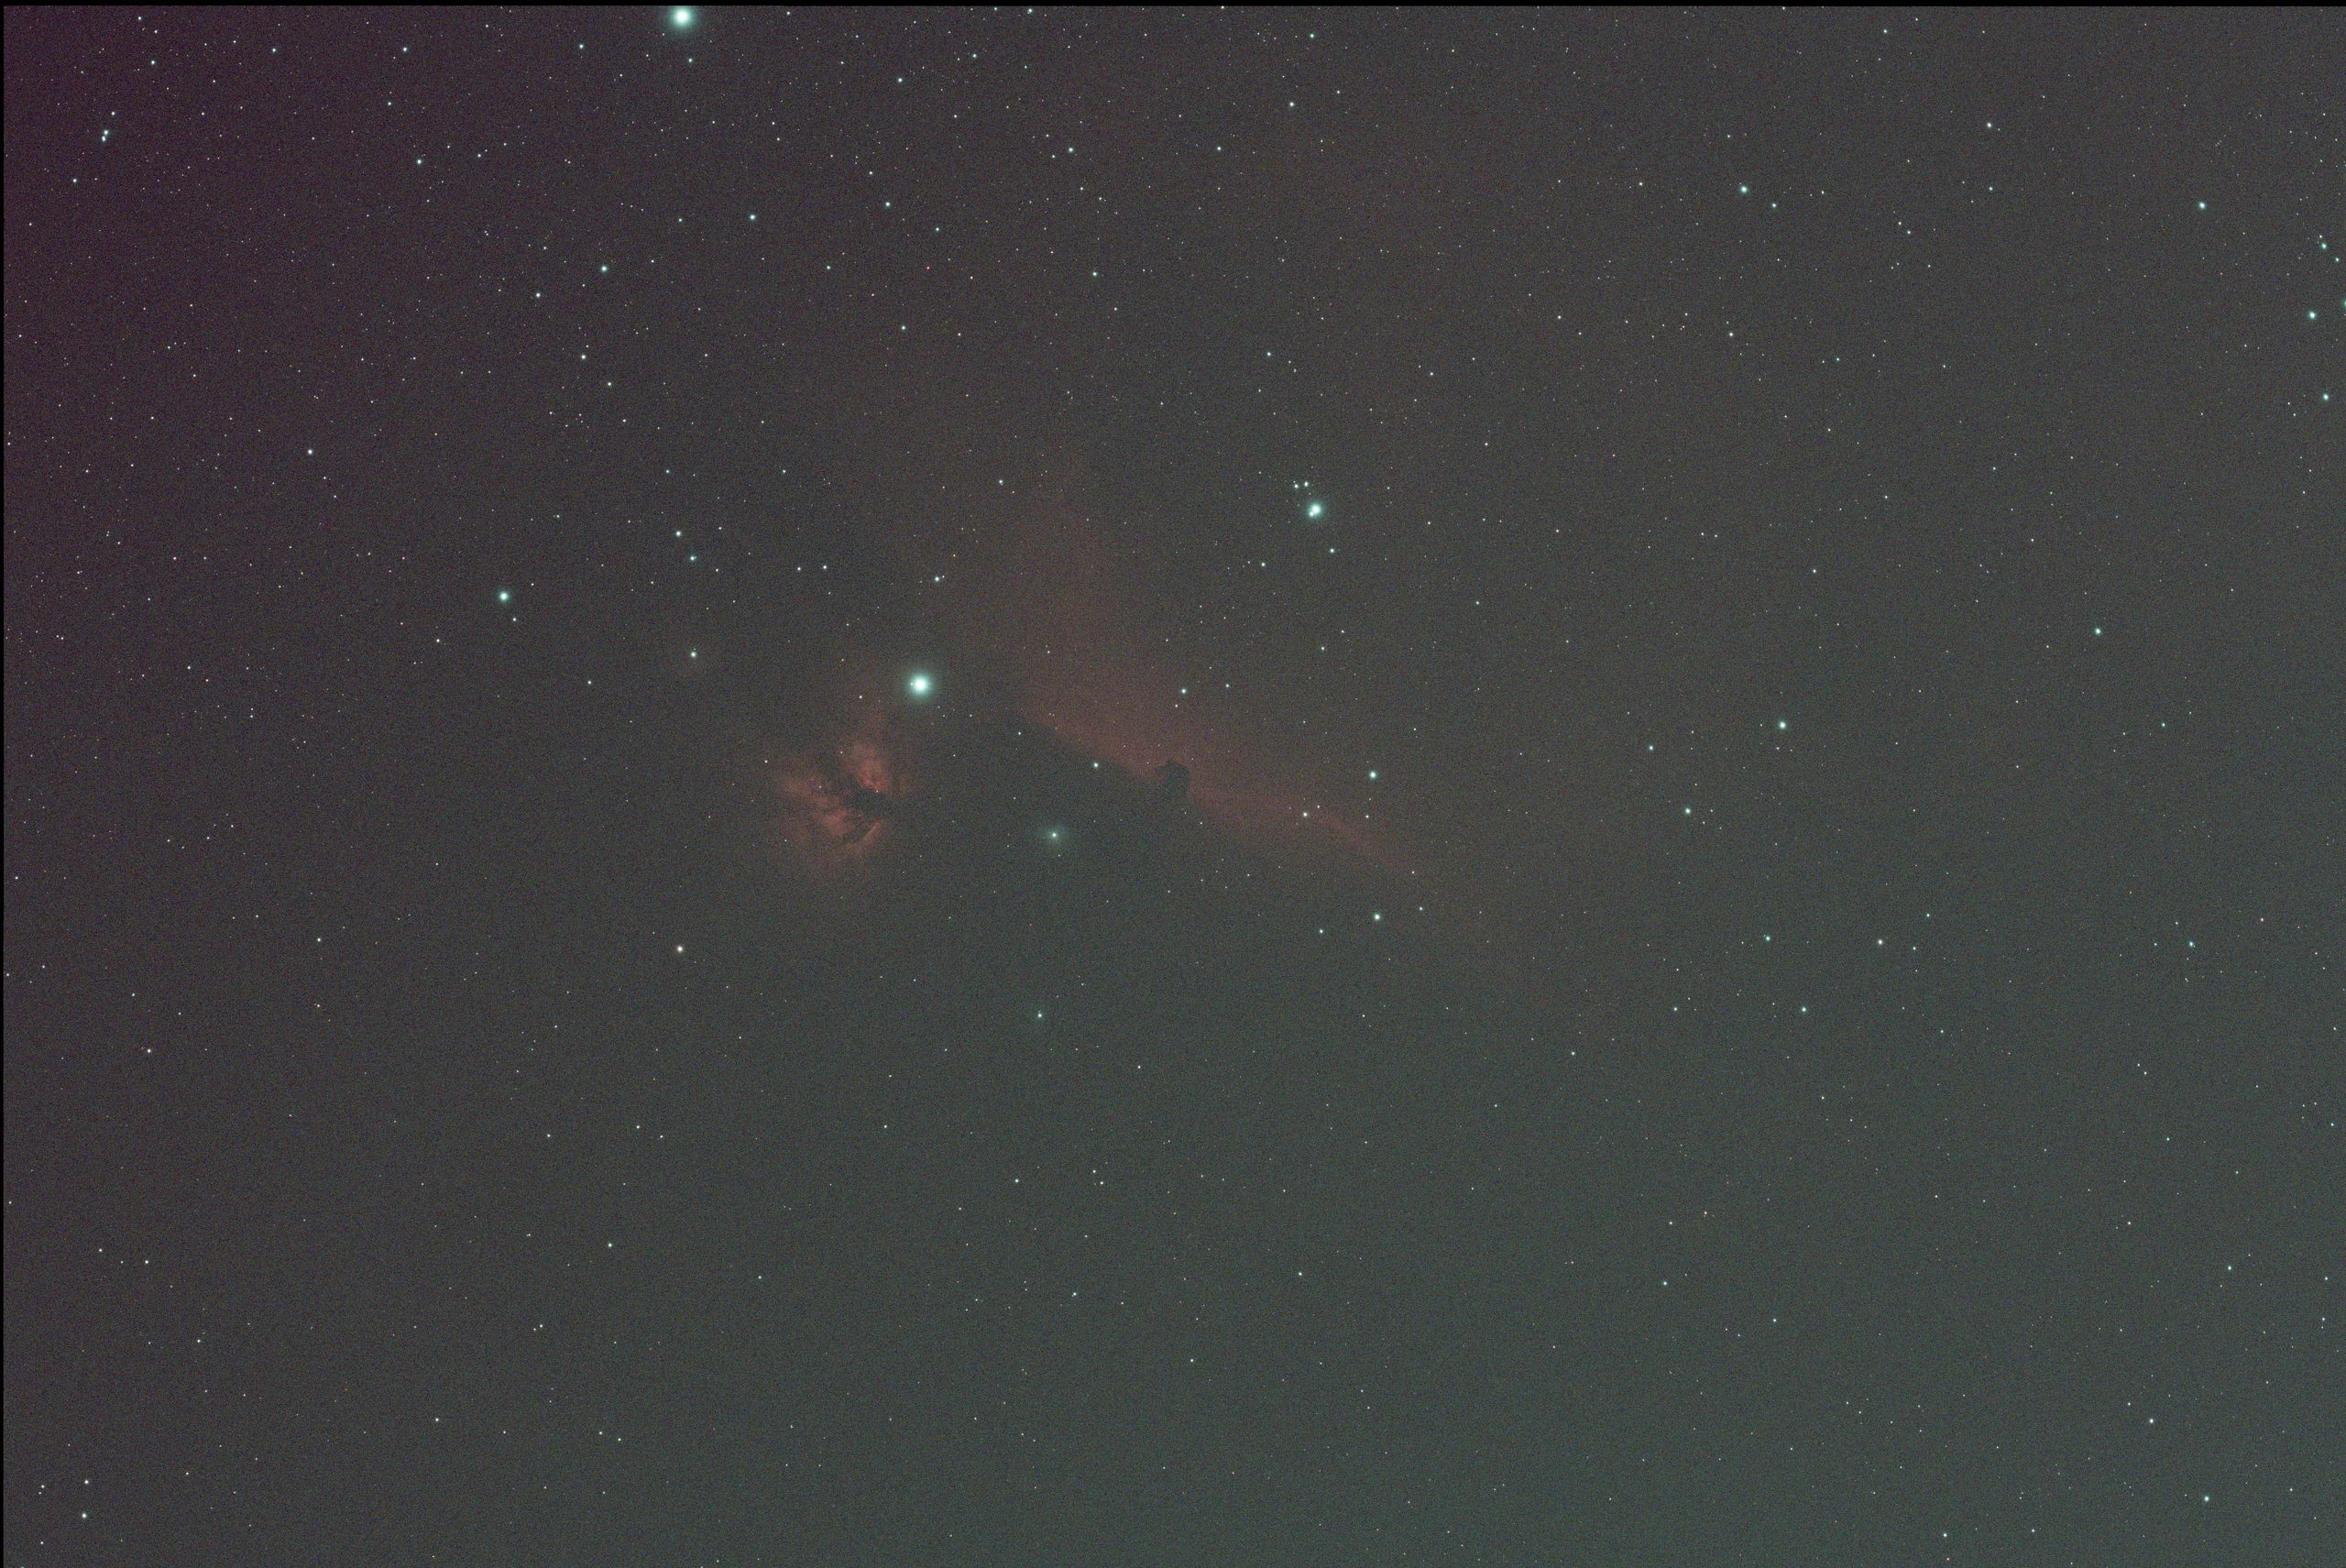
All that time and my raw image looks like nothing!
Before diving into noise reduction, color calibration, or star refinement, let's start with one of the most fundamental transformations in astrophotography: stretching. It's not typically the first step in a formal workflow, but in practice, it's the first thing many of us do - because we can't work with what we can't see.
Even after careful calibration and stacking, your image is still linear - meaning its brightness values correspond directly to the amount of light captured. But linear images are extremely dark, often looking nearly black, just like the raw image shown at the start of this page. Why? It comes down to bit depth, and how human eyes - and computer monitors - perceive light.
Bit Depth: Camera to Screen
My astrophotography camera records data at 16 bits per channel - that's 65,536 possible brightness levels per pixel. This high precision is excellent for capturing tiny differences in faint detail, like the subtle glow of hydrogen gas in a nebula or the delicate arms of a distant galaxy. Those fine gradations are critical.
But here's the catch: most computer monitors can only display 8 bits per channel, which is just 256 brightness levels per color. Even professional displays typically max out at 10 bits per channel, or 1024 steps. That's a massive mismatch between what my camera can capture and what our screens can display.
Most of the detail my camera captures is compressed into a narrow portion of my screen's brightness range. The variations in brightness - especially in the faint parts of a stacked image - are often smaller than the difference between two adjacent brightness levels on the monitor. That means entire structures can be hidden within a single dark shade, making them completely invisible on the screen. At the same time, a large portion of the screen's higher brightness range - those lighter greys and whites - is sitting largely unused. In the raw stacked image shown at the start of this page, there's barely any midtone or highlight - almost everything is crammed into the darkest areas.
By stretching the image, I'm able to expand those subtle details across the full 256-step brightness range of the monitor, making them visible.
Example
The bit-depth diagram shows why stretching is essential. While my camera captures data on a 16-bit scale from 0 to 65,535, the software I use for processing - PixInsight - converts those values into a floating-point scale ranging from 0.0000 (black) to 1.0000 (white). For example, a camera value of 12,500 would be displayed in PixInsight as 0.1908.
In this image of the Horsehead Nebula, the darkest region inside the nebula has a value of 0.0013, the surrounding dust has a slightly higher value of 0.0017, and the brighter background nebula registers at 0.0024. These values are extremely low, and without a temporary stretch applied (more on that soon!), this entire section would appear completely black on screen.
The key issue is not just how faint these values are, but how close together they are. The difference between them is visually meaningful in the image - but on an 8-bit monitor, each grayscale step is approximately 0.0039. That means all three of these values could fall within a single brightness level, making them indistinguishable from one another. The subtle structure and depth in this region would be lost.
This is why stretching is essential: it expands these low values across the monitor's available dynamic range, making fine details visible and distinguishable. It is not simply about making the image brighter; it preserves and reveals the delicate tonal differences that bring deep-sky structures to life.
Try It Yourself
The interactive demo uses the regular final Horsehead image from this page, darkens it into a near-black teaching preview, and then runs a real midtones transfer function - the same kind of curve PixInsight uses to reveal faint structure. Drag the slider and watch how the tones open up.
- Midtones
- 0.5000
- Black point
- 0.000
- Shadow output
- --
- Faint detail output
- --
Why Cover Stretching First?
Stretching is how we fix this. It's the process of redistributing the pixel brightness values - compressing the highlights and expanding the shadows and midtones - so that the faint details become visible on your screen. Think of it as remapping those 65,536 levels into the 256 levels your monitor can actually display, but in a way that emphasizes what's most important.
While stretching usually comes after calibration, stacking, and some preliminary cleanup, such as color calibration or background neutralization, I apply a temporary stretch right away. This is not a permanent change; it simply lets me see what is happening in the image so I can make informed processing decisions.
The pre-processing examples in this section use a temporary screen stretch so their subtle differences remain visible. Without it, the frames would look nearly as dark as the raw image shown at the start of the page, even while color calibration, noise reduction, and gradient removal were changing the underlying data.
How I Stretch the Image
The full stretching process appears later in the workflow.
Pre-Processing
I have 400 images, what do I do now?
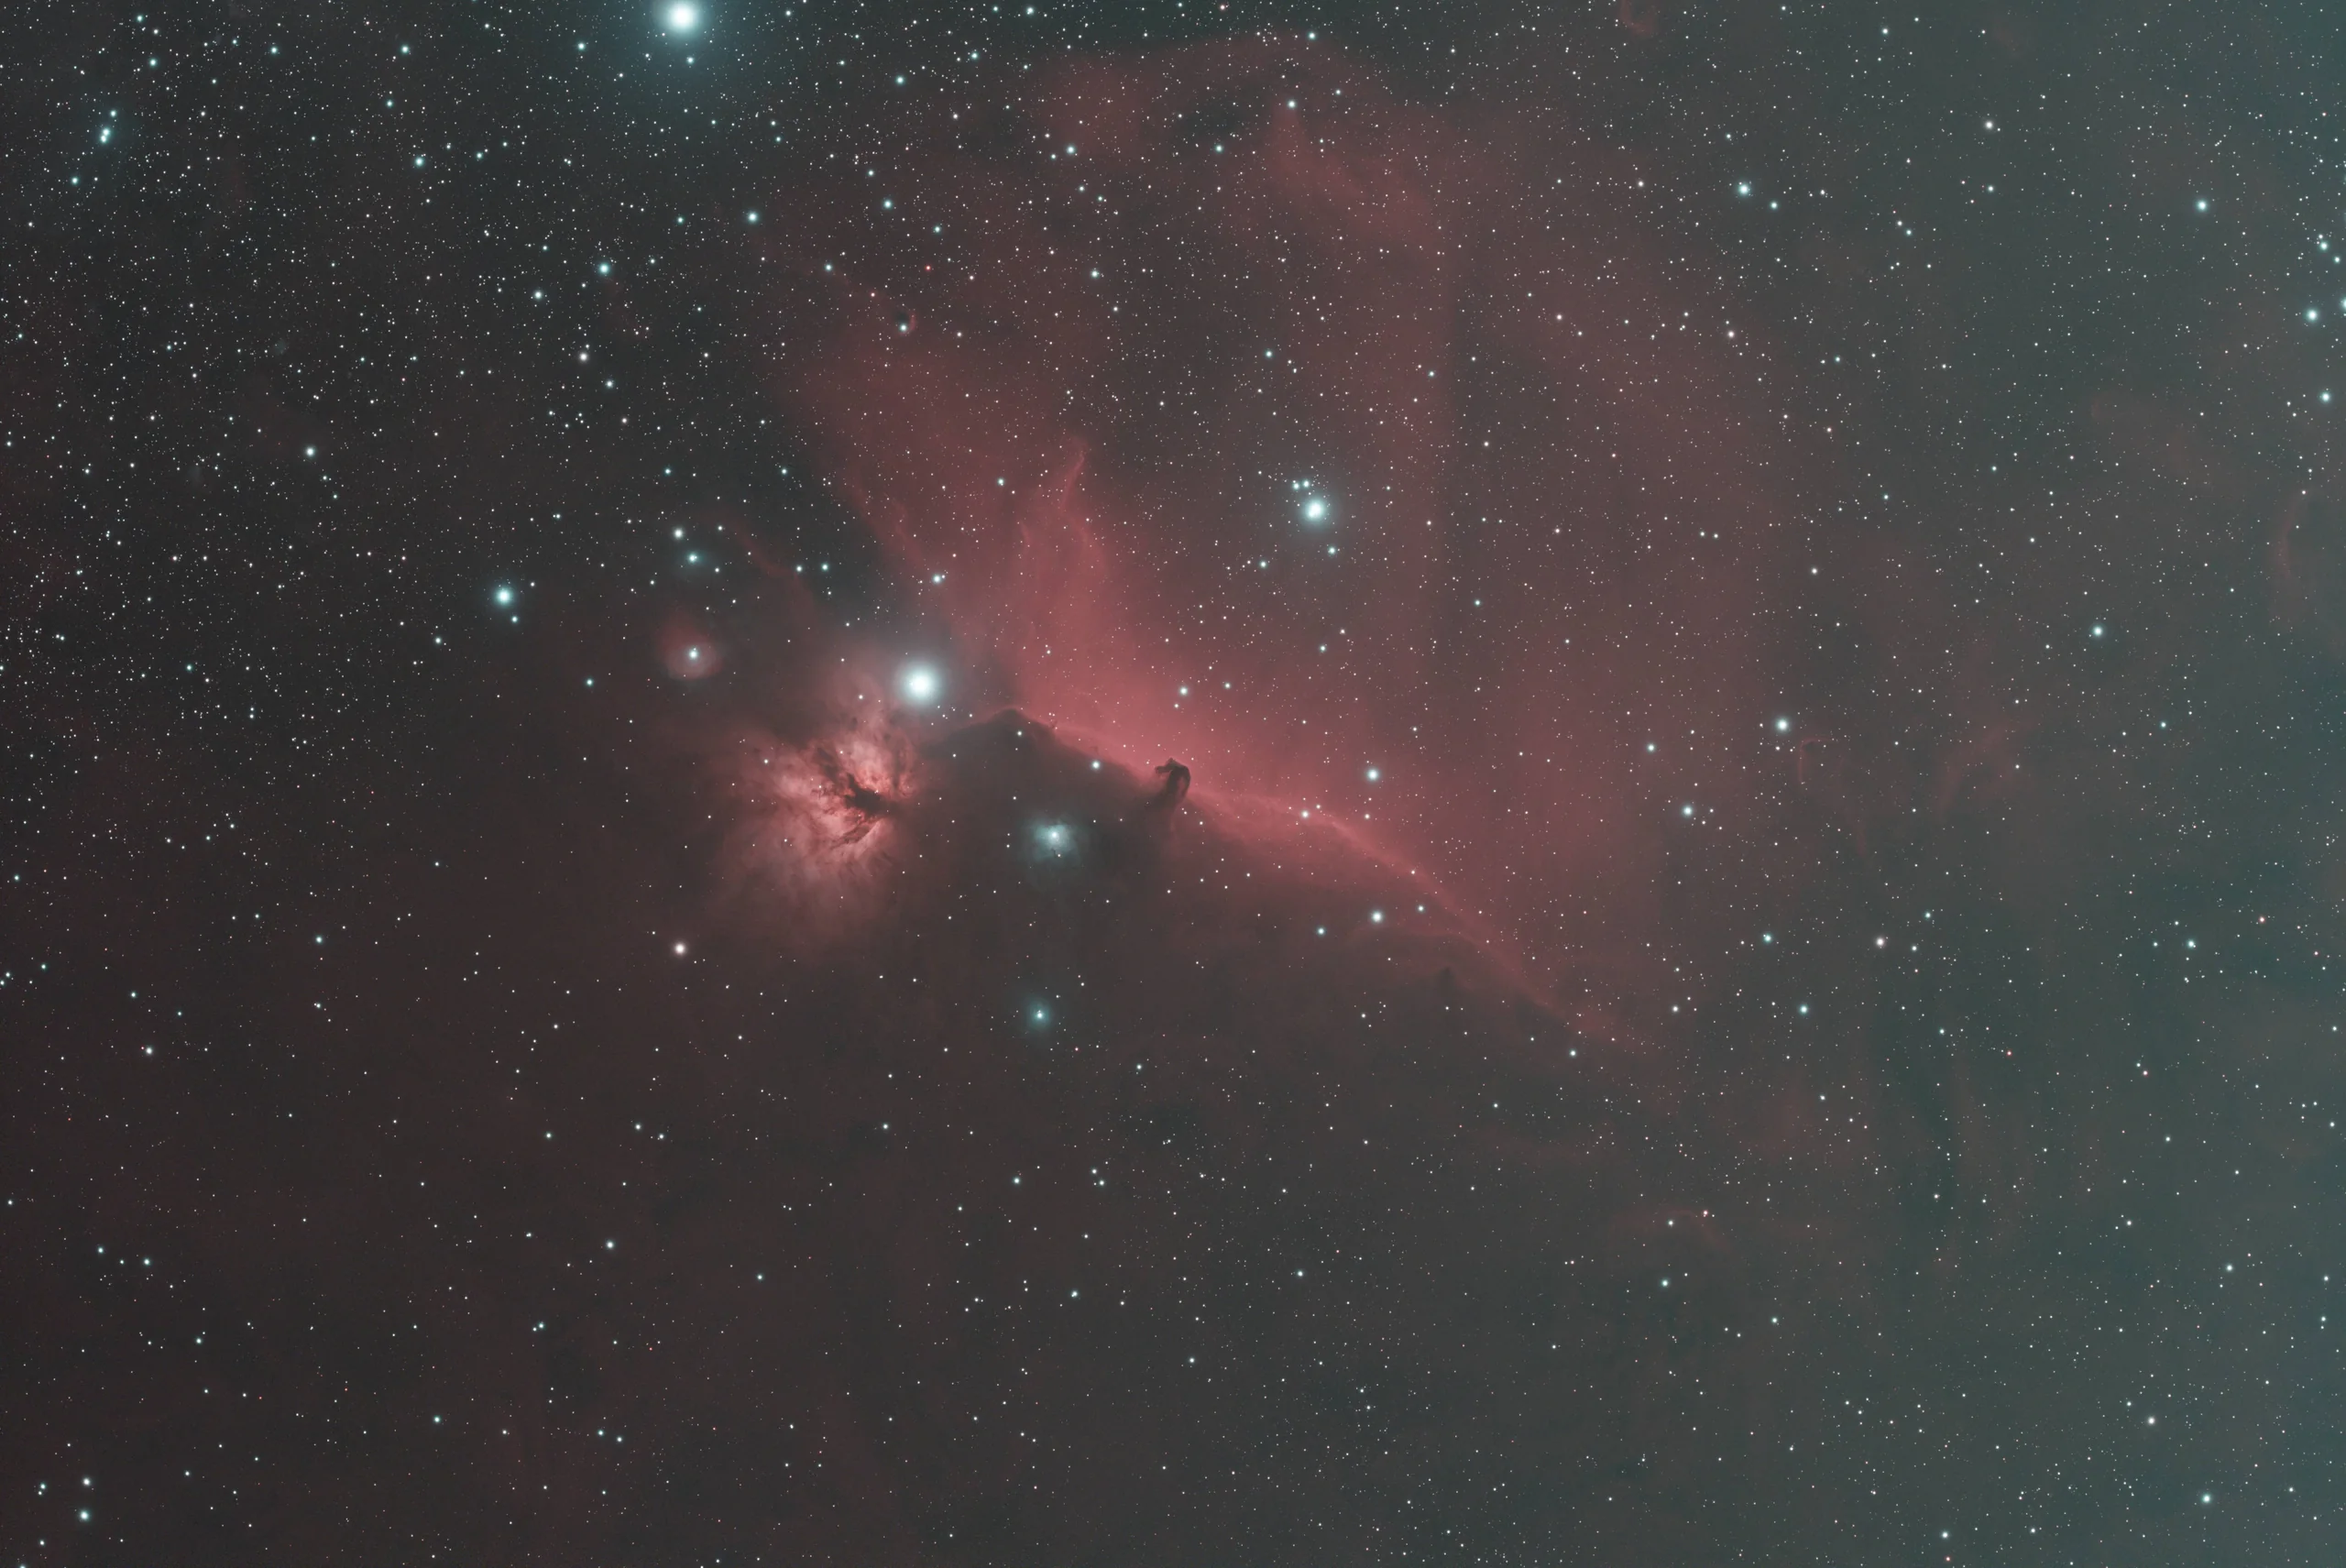
Let's begin with stacking, the first major step. A deep-sky project uses dozens or even hundreds of individual exposures called light frames. Each frame contains only a faint signal from the target, but combining them reduces random noise and strengthens real detail.
This comparison pairs one light frame with a stack made from many frames. The combined image shows more nebular detail and less noise. Both examples have been temporarily stretched and reduced in size so they can be viewed clearly on the page; one full-resolution raw frame from my camera is about 50 MB.
 Single FrameStacked Frames
Pre-Processing Steps
For pre-processing and stacking, I use PixInsight's Weighted Batch Preprocessing (WBPP) tool. It runs the main preparation steps in sequence after I load the light and calibration frames and configure the process. A large project can take hours, and occasionally more than a day, to complete.
- Calibration: Apply calibration frames to correct the data.
- Debayering: Convert raw sensor data into a full-color RGB image.
- Measurement and rejection: Identify and remove poor-quality light frames.
- Plate solving: Match stars to known celestial coordinates.
- Registration: Align every frame so the stars overlap precisely.
- Normalization: Match brightness and background levels across the set.
- Integration: Combine the prepared frames into one master image.
Calibration
My workflow starts with calibration of the raw light frames (the actual photos of my target) using calibration frames. Calibration means cleaning up those raw images with additional reference shots I've taken: flats, darks, and bias frames. I usually take around 30 flat frames at the end of each session - these are photos of a uniform light source (light panel sitting on top of my telescope pointed directly up) that reveal and correct optical issues such as vignetting (dark corners) and dust spots on the sensor.
The flat-frame example shown here reveals vignetting in the top-left and bottom-right corners. The large blurry circles come from dust particles on the telescope lens or camera sensor. These are unavoidable and show up on every light frame I take, but calibration frames let me subtract these issues from the light frames.
I also maintain a reusable library of calibration frames: about 100 bias frames combined into a master bias, and roughly 50 dark frames combined into a master dark. Applying the masters corrects fixed readout patterns, thermal noise, hot pixels, dust shadows, and uneven illumination before stacking.
Debayer
Because I use an OSC camera, each calibrated frame begins as a Bayer matrix: a grid of pixels filtered for red, green, or blue light. Debayering interprets that pattern and estimates the missing color information for each pixel, producing a full-color RGB image. Before debayering, the frame appears grayscale and checkered; afterward, it shows the target's color. The equipment page explains the Bayer pattern in more detail.
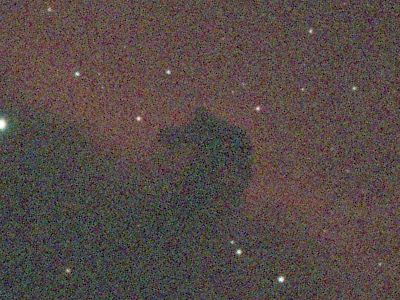
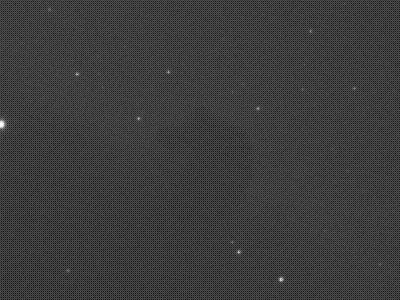 BeforeAfter
Image Measurement & Rejection
Next, WBPP evaluates the quality of each exposure. It measures star size and roundness, background noise, and overall brightness, then assigns a weight to every frame. Images affected by tracking errors, bumps, or passing clouds can be flagged and removed before integration, preventing weak data from degrading the final stack.
Plate Solving
Another step I often include is plate solving, which determines exactly where each photo is pointing by matching the stars in the image to known celestial coordinates. WBPP compares the star pattern in each frame with a catalog to determine the right ascension, declination, and image scale. This does not change the picture's appearance, but it embeds coordinate information, known as WCS data, in the image file. That information is especially useful when combining data from multiple nights or annotating the final image with object names.
Registration (Alignment)
Now that my frames are cleaned, in color, and scored (with any bad ones tossed out), the next crucial step is registration, which means alignment. Even with a good tracking mount, each of my exposures might be slightly shifted, rotated, or scaled differently from the others. WBPP picks one image - usually the best light frame - as a reference, and then it aligns all the other frames to that reference. It uses the stars as guide points, shifting and rotating each image so that all the stars (and the rest of the details) line up perfectly across the stack. After registration, if I flip through the images like a flipbook, the stars stay fixed in the same position in every frame. This perfect alignment is critical for stacking; it ensures that when we combine the images, the stars and features overlap rather than blur out.
Normalization
Before actually stacking the pictures, WBPP also performs normalization to ensure the brightness and background level of each frame is consistent. This step compensates for any changes in sky conditions or exposure between shots. For example, perhaps some of my photos were taken under a darker sky early at night and others later when a bit of moonlight or dawn light brightened the sky - those frames would have different overall brightness. Normalization adjusts each image's intensity scale (using a reference image or common median level) so that all the frames have a similar brightness and background level. In practice, it evens out things like slight differences in exposure or sky glow, making the set of images uniform. No single frame will be drastically brighter or darker than the rest, which prevents one image from overwhelming the stack or causing visible seams.
Integration (Stacking)
Finally, I reach the integration stage - the grand finale where all the prepared frames are stacked together into one master image. During integration, WBPP takes the corresponding pixels from every frame and combines them, usually by averaging (with smart algorithms that also reject outlier pixels, like those from satellite trails or cosmic rays). Because everything is calibrated, aligned, and normalized beforehand, the pixels that belong to real stars and nebulae line up and reinforce each other. With many frames contributing, the signal (the actual light from stars/nebulae) adds up, while the random noise in each frame tends to cancel out. The result is a single "master light" image that has a much higher signal-to-noise ratio than any individual exposure. In other words, faint details become more visible and the overall image looks cleaner and less grainy. This is the big payoff of stacking: a final image that reveals far more detail and clarity than any single shot could.
See Stacking in Action
Use the slider to move from the real single-light Horsehead frame toward the real combined frame introduced earlier in this section. The in-between steps model how the visible noise fades as more sub-exposures are stacked.
- Modeled subs
- 1
- Integration
- 5 min
- Residual noise
- 100%
- SNR gain
- ×1.0
Post-Processing
Art and Science
Post-processing is where the fun truly begins - where the art meets the science, and where all the hard work finally starts to reveal what the camera has captured. There's no single "correct" way to process an image. Each night, each target, and each astrophotographer brings a different approach. While I follow a general workflow tailored to different object types, I frequently stray from the path - experimenting with new techniques in search of a better result.
I often process the same data several times, leaving days between versions. A result may feel finished at first, yet reveal an imbalance after I have lived with it for a while. Returning with fresh eyes, better tools, or more experience often leads to a stronger interpretation, which is why few images ever feel permanently final.
All of my processing is done in PixInsight, a powerful platform built specifically for astrophotography. It has a steep learning curve, but with every hour I spend studying it, I find new ways to pull out subtle details hidden in the cosmic noise.
Each target responds differently, but the following steps form the foundation of the workflow I return to most often.
Gradient Removal
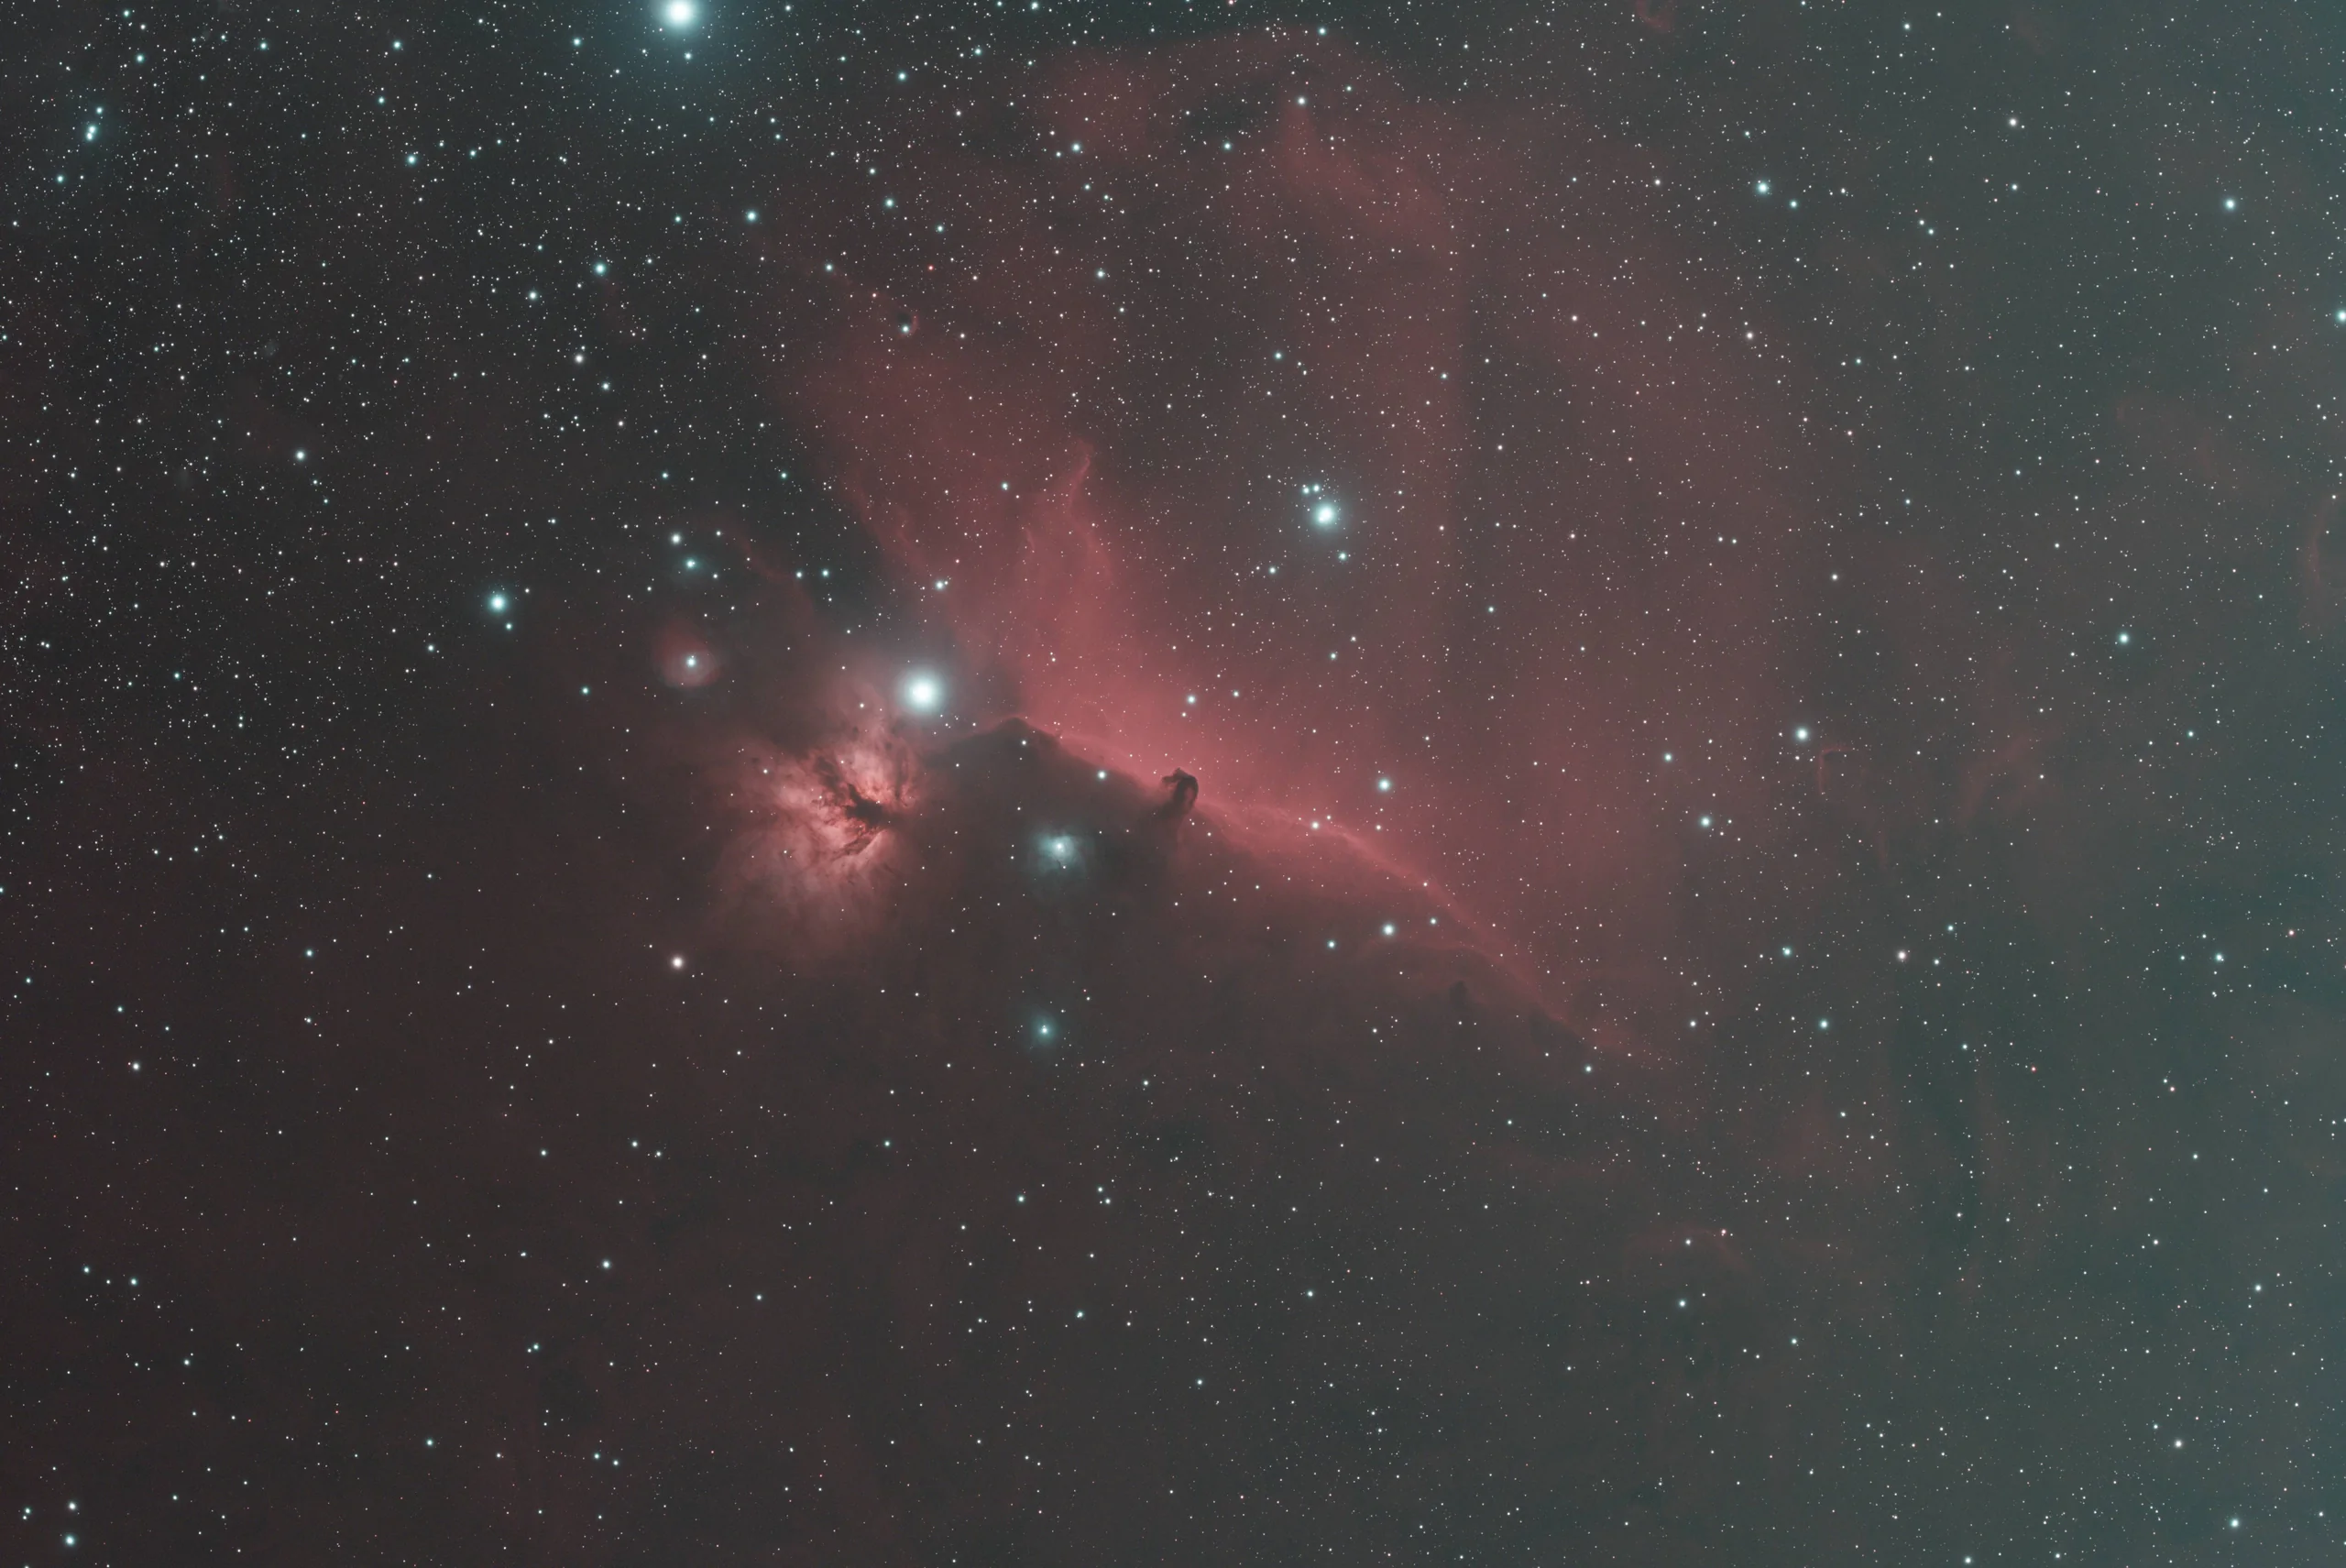
Once the data is calibrated and stacked, one of the first challenges to address is uneven background illumination. From my suburban sky, I often have a significant gradient from light pollution, moonlight, or simply natural sky glow. Left alone, these gradients can mask faint structures, skew color balance, and distract from the target itself.
I use a few different methods depending on the severity and pattern of the gradient, but the two tools I rely on most are Dynamic Background Extraction (DBE) and Gradient Correction. DBE gives precise, manual control - I place sample points across the image to model and subtract the background - which is ideal when gradients are complex or non-uniform. Gradient Correction, on the other hand, is more automated and useful for quick cleanup or when I want a fast first pass to assess the image.
This step takes some trial and error. The goal is to neutralize the background without flattening the image or removing faint nebulosity. I avoid placing sample points over subtle structures, especially in wide-field images where the target blends into the background. Good gradient removal is often invisible; it simply removes an unwanted distraction.
 BeforeAfter
Color Calibration
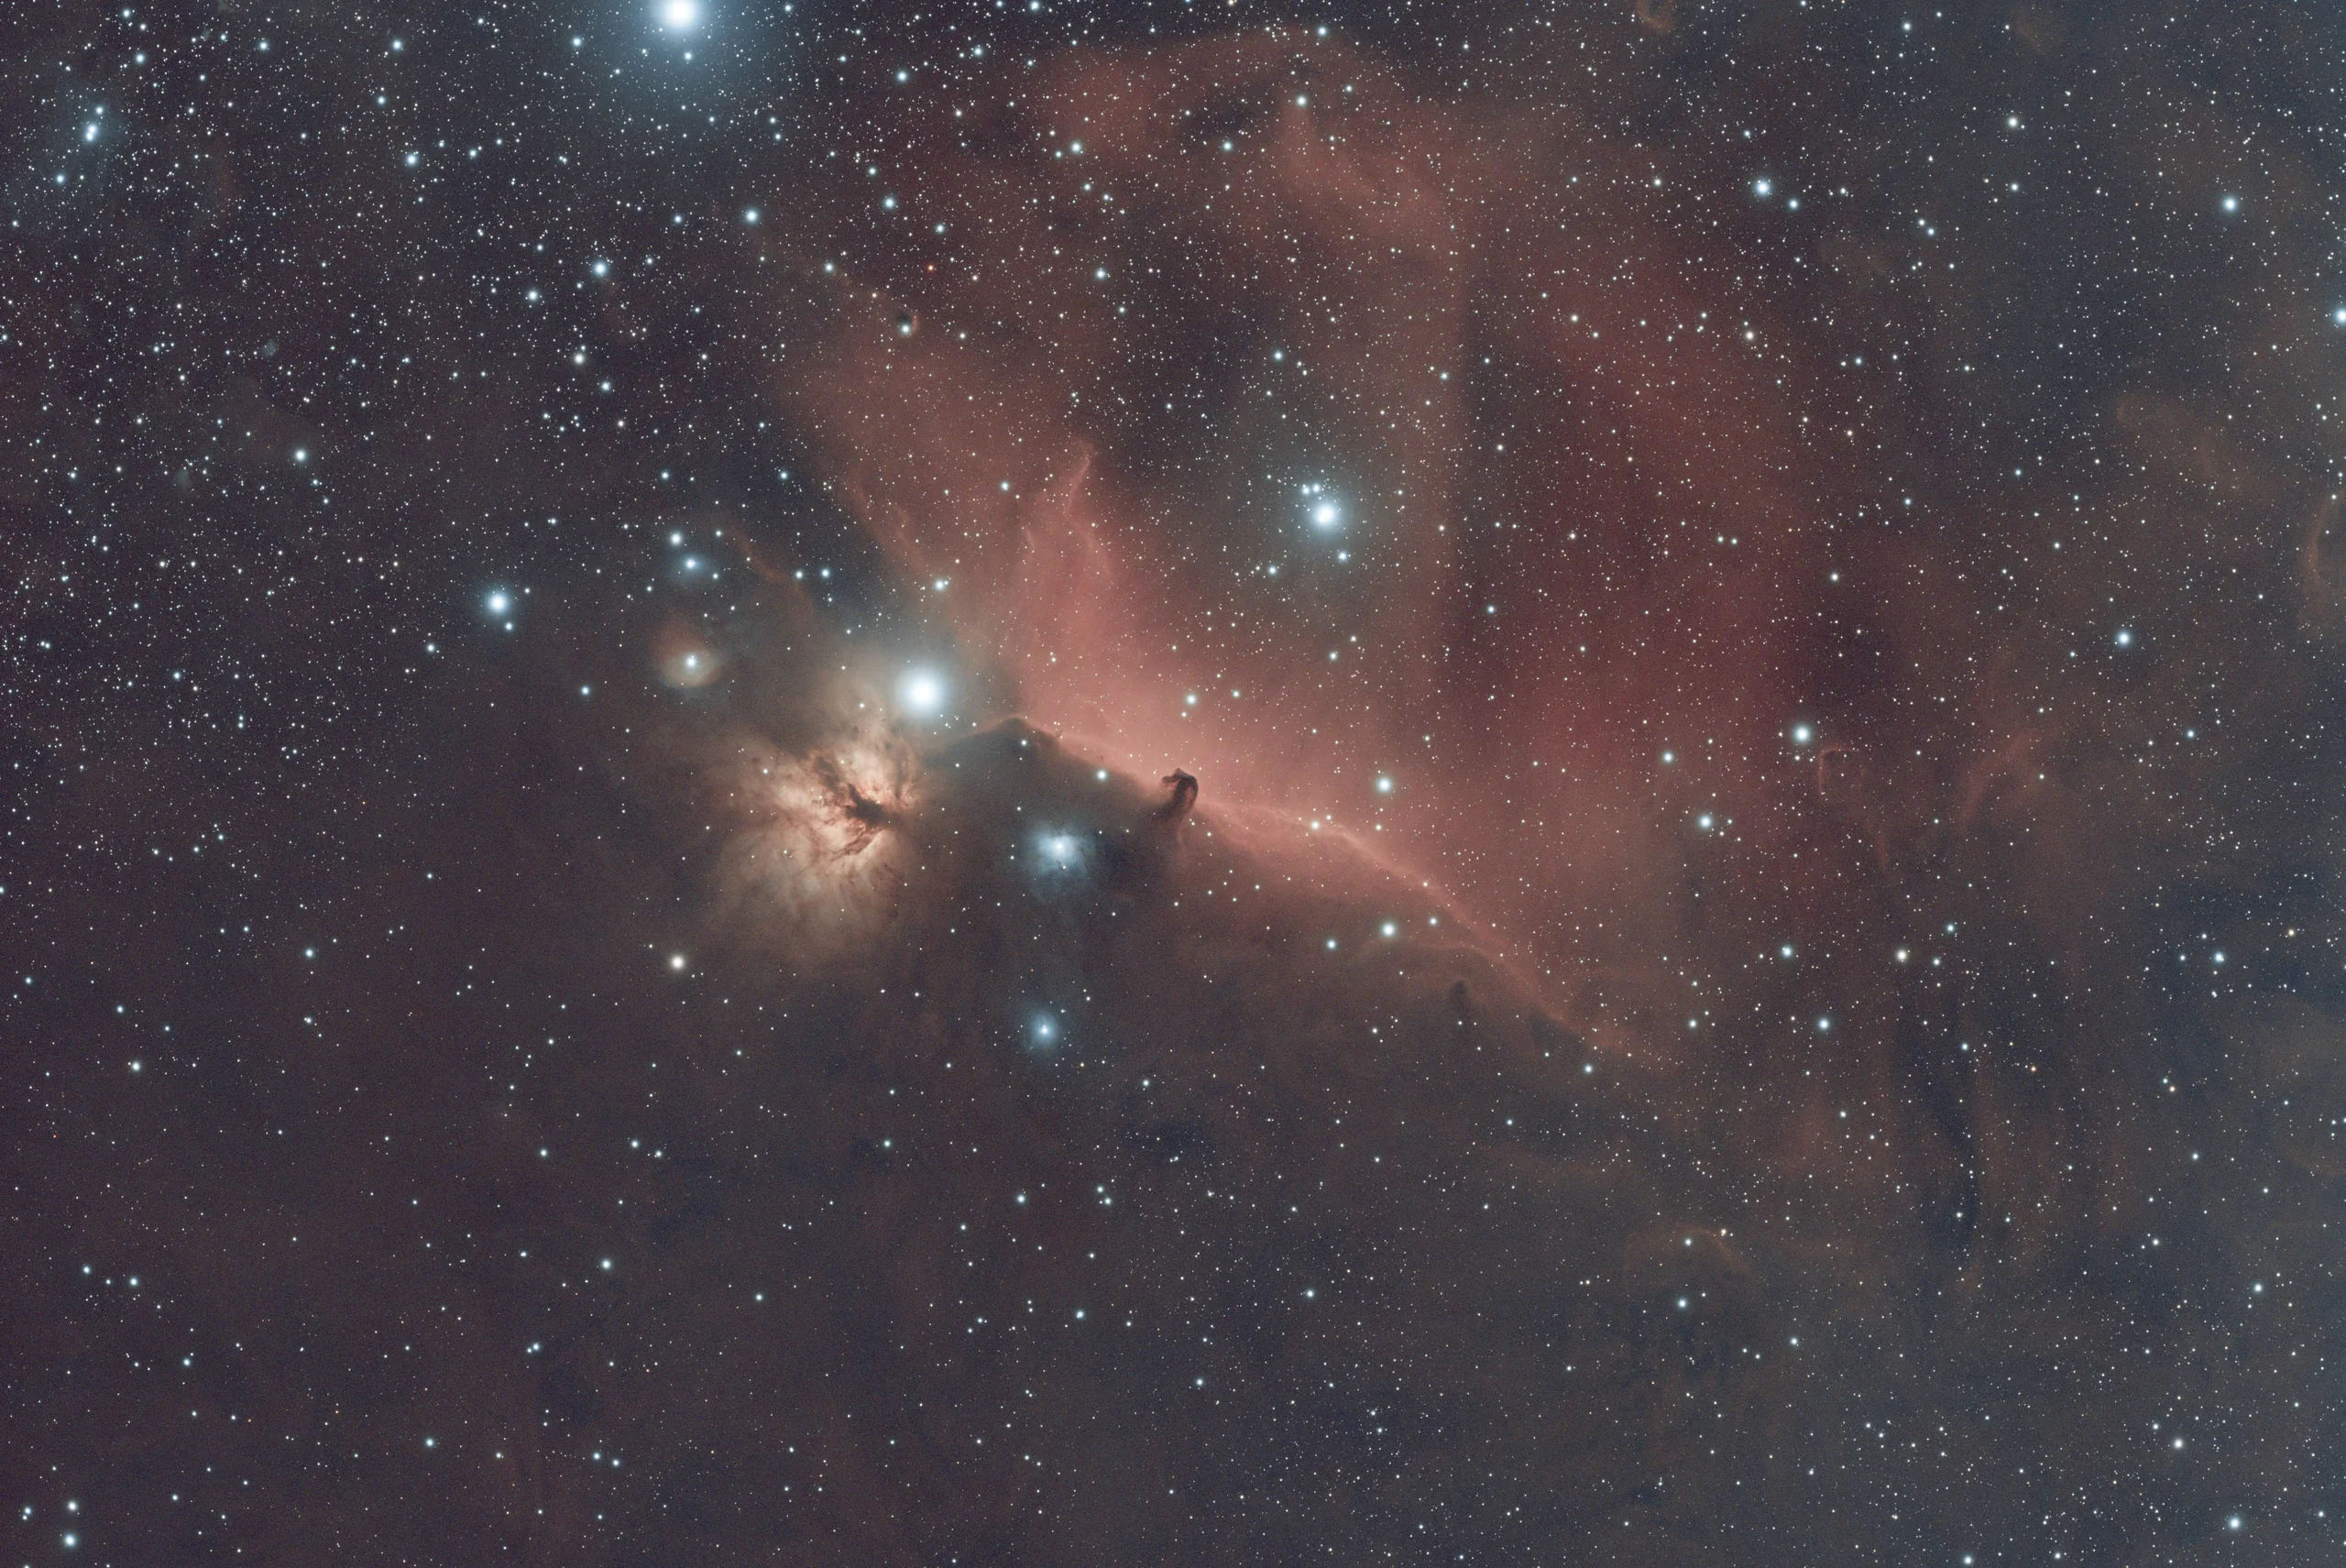
The next step is to balance the color - turning the raw, often greenish or muted image into something more natural and true to the sky. Proper color calibration helps ensure stars have realistic hues, galaxies show their full variety of tones, and background space is truly neutral. It sets the stage for everything that comes next.
I most often use Spectrophotometric Color Calibration (SPCC), which references known star catalogs to accurately restore natural star colors. This is especially helpful when imaging with filters, like the L-eNhance, which I frequently use for nebulae. The L-eNhance is a dual-bandpass filter that isolates H-alpha and OIII emission lines, dramatically reducing light pollution and enhancing faint structures - but it can introduce color shifts that SPCC helps to correct.
As with many steps in PixInsight, this one can seem subtle - but its impact is foundational. Getting the color right early on helps preserve natural contrast, prevents color clipping later in the workflow, and makes the final image feel more lifelike. When calibration works well, the color balance often needs little or no adjustment after stretching.
 BeforeAfter
Star Separation
In many deep-sky images, especially of nebulae, the stars can dominate the frame - sometimes at the expense of the more delicate structures I'm trying to showcase. To manage that, I often use StarXTerminator, a powerful tool that cleanly separates stars from the background structures. This gives me much more flexibility during processing.
I typically run StarXTerminator, a third-party PixInsight add-on, before stretching. It produces a starless image for processing nebulosity or galactic detail and a stars-only image that I can treat more gently.
Star separation isn't just about reducing distraction - it's about control. With the stars removed, I can stretch the image more aggressively, apply local contrast enhancements, adjust saturation, or reduce noise without affecting the stars. Then, once both components are processed, I recombine them in a way that feels natural and balanced.
Sometimes I'll reduce the size of stars or soften their appearance slightly to keep them from overpowering the subject. Other times, I'll just restore them as-is. It depends on the target - and the story I want the image to tell.
Stretching
As mentioned in the first section, up until this point, I rely on temporary screen stretches (like STF in PixInsight) to preview the image while working. But eventually, I need to make that stretch permanent to continue with processing.
For that, I typically use Generalized Hyperbolic Stretch (GHS) - a powerful stretching tool in PixInsight. Unlike a basic histogram or midtones transfer, GHS offers fine control over how different brightness ranges are handled. It allows me to stretch areas like the silhouetted shapes of dark nebulae and the bright cores of emission regions independently, so I can bring out the subtle details in the shadows without blowing out the highlights.
By isolating the nebula or galaxy, I can bring out the faintest details of gas or dust without worrying about star bloat or clipping. Once I'm happy with the background, I apply a gentler stretch to the stars-only image and recombine them.
Stretching can be one of the most creative steps - and also one of the most delicate. Push too far, and noise or artifacts can creep in. Hold back, and you miss the depth hidden in the shadows.
Noise Reduction
One of my main goals with astrophotography is to maximize the good signal and minimize the noise. But even with long exposures, noise is inevitable - especially in the darkest regions of the image. Thermal noise, read noise, and even leftover background variation can all obscure faint detail or make an image feel rough and grainy.
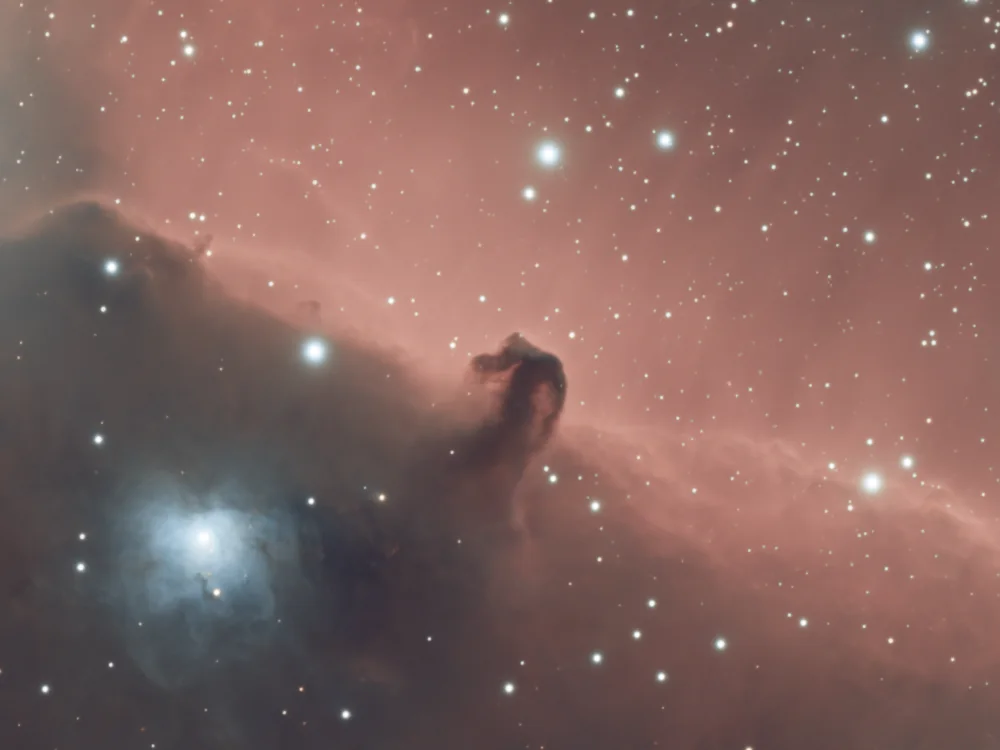
To manage this, I use NoiseXTerminator, an AI-based tool in PixInsight that does an excellent job preserving detail while reducing noise. I typically apply it while the image is still linear, before stretching, which gives the cleanest results and helps prevent amplifying noise during the stretch. In some cases, I'll also run a second pass after stretching, targeting just the chrominance (color) noise with a gentle touch.
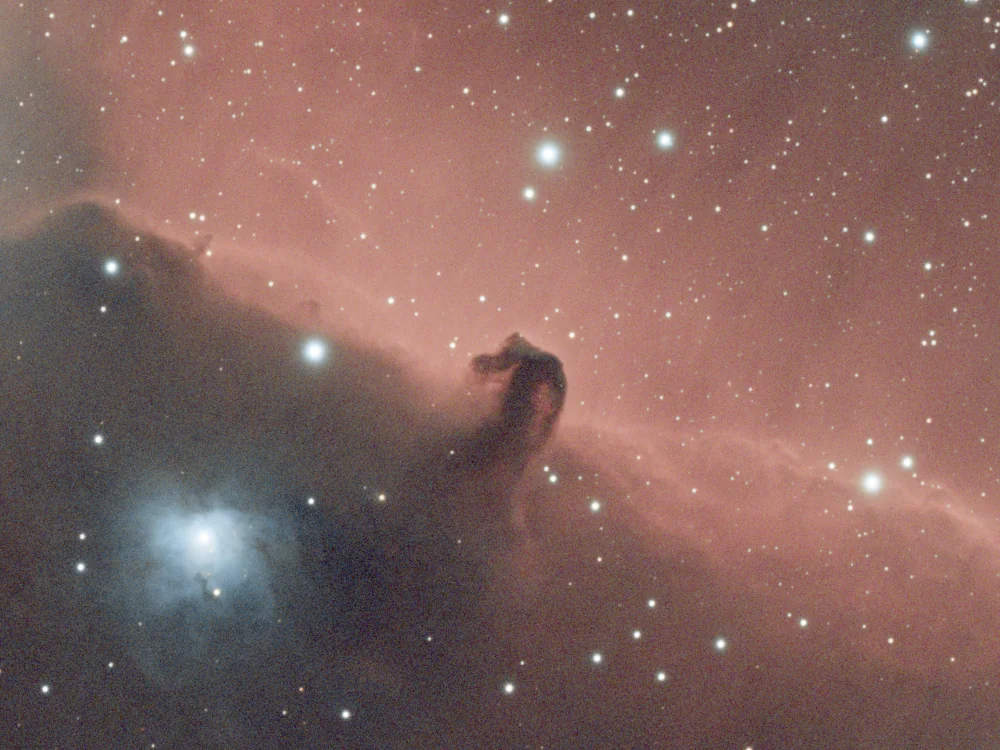
This side-by-side example of the Horsehead Nebula shows the effect. In the original, the background is noisy and the structure of the nebula is partially lost in the grain. After applying NoiseXTerminator, the noise is reduced while the shape and fine texture of the nebula remain intact - a much smoother and more natural-looking result.
Noise reduction is all about balance. In my early images, I often applied too much, leaving the background sky blotchy. I learned to use lighter adjustments and preserve the texture of real detail.
 BeforeAfter
Contrast and Color Enhancement
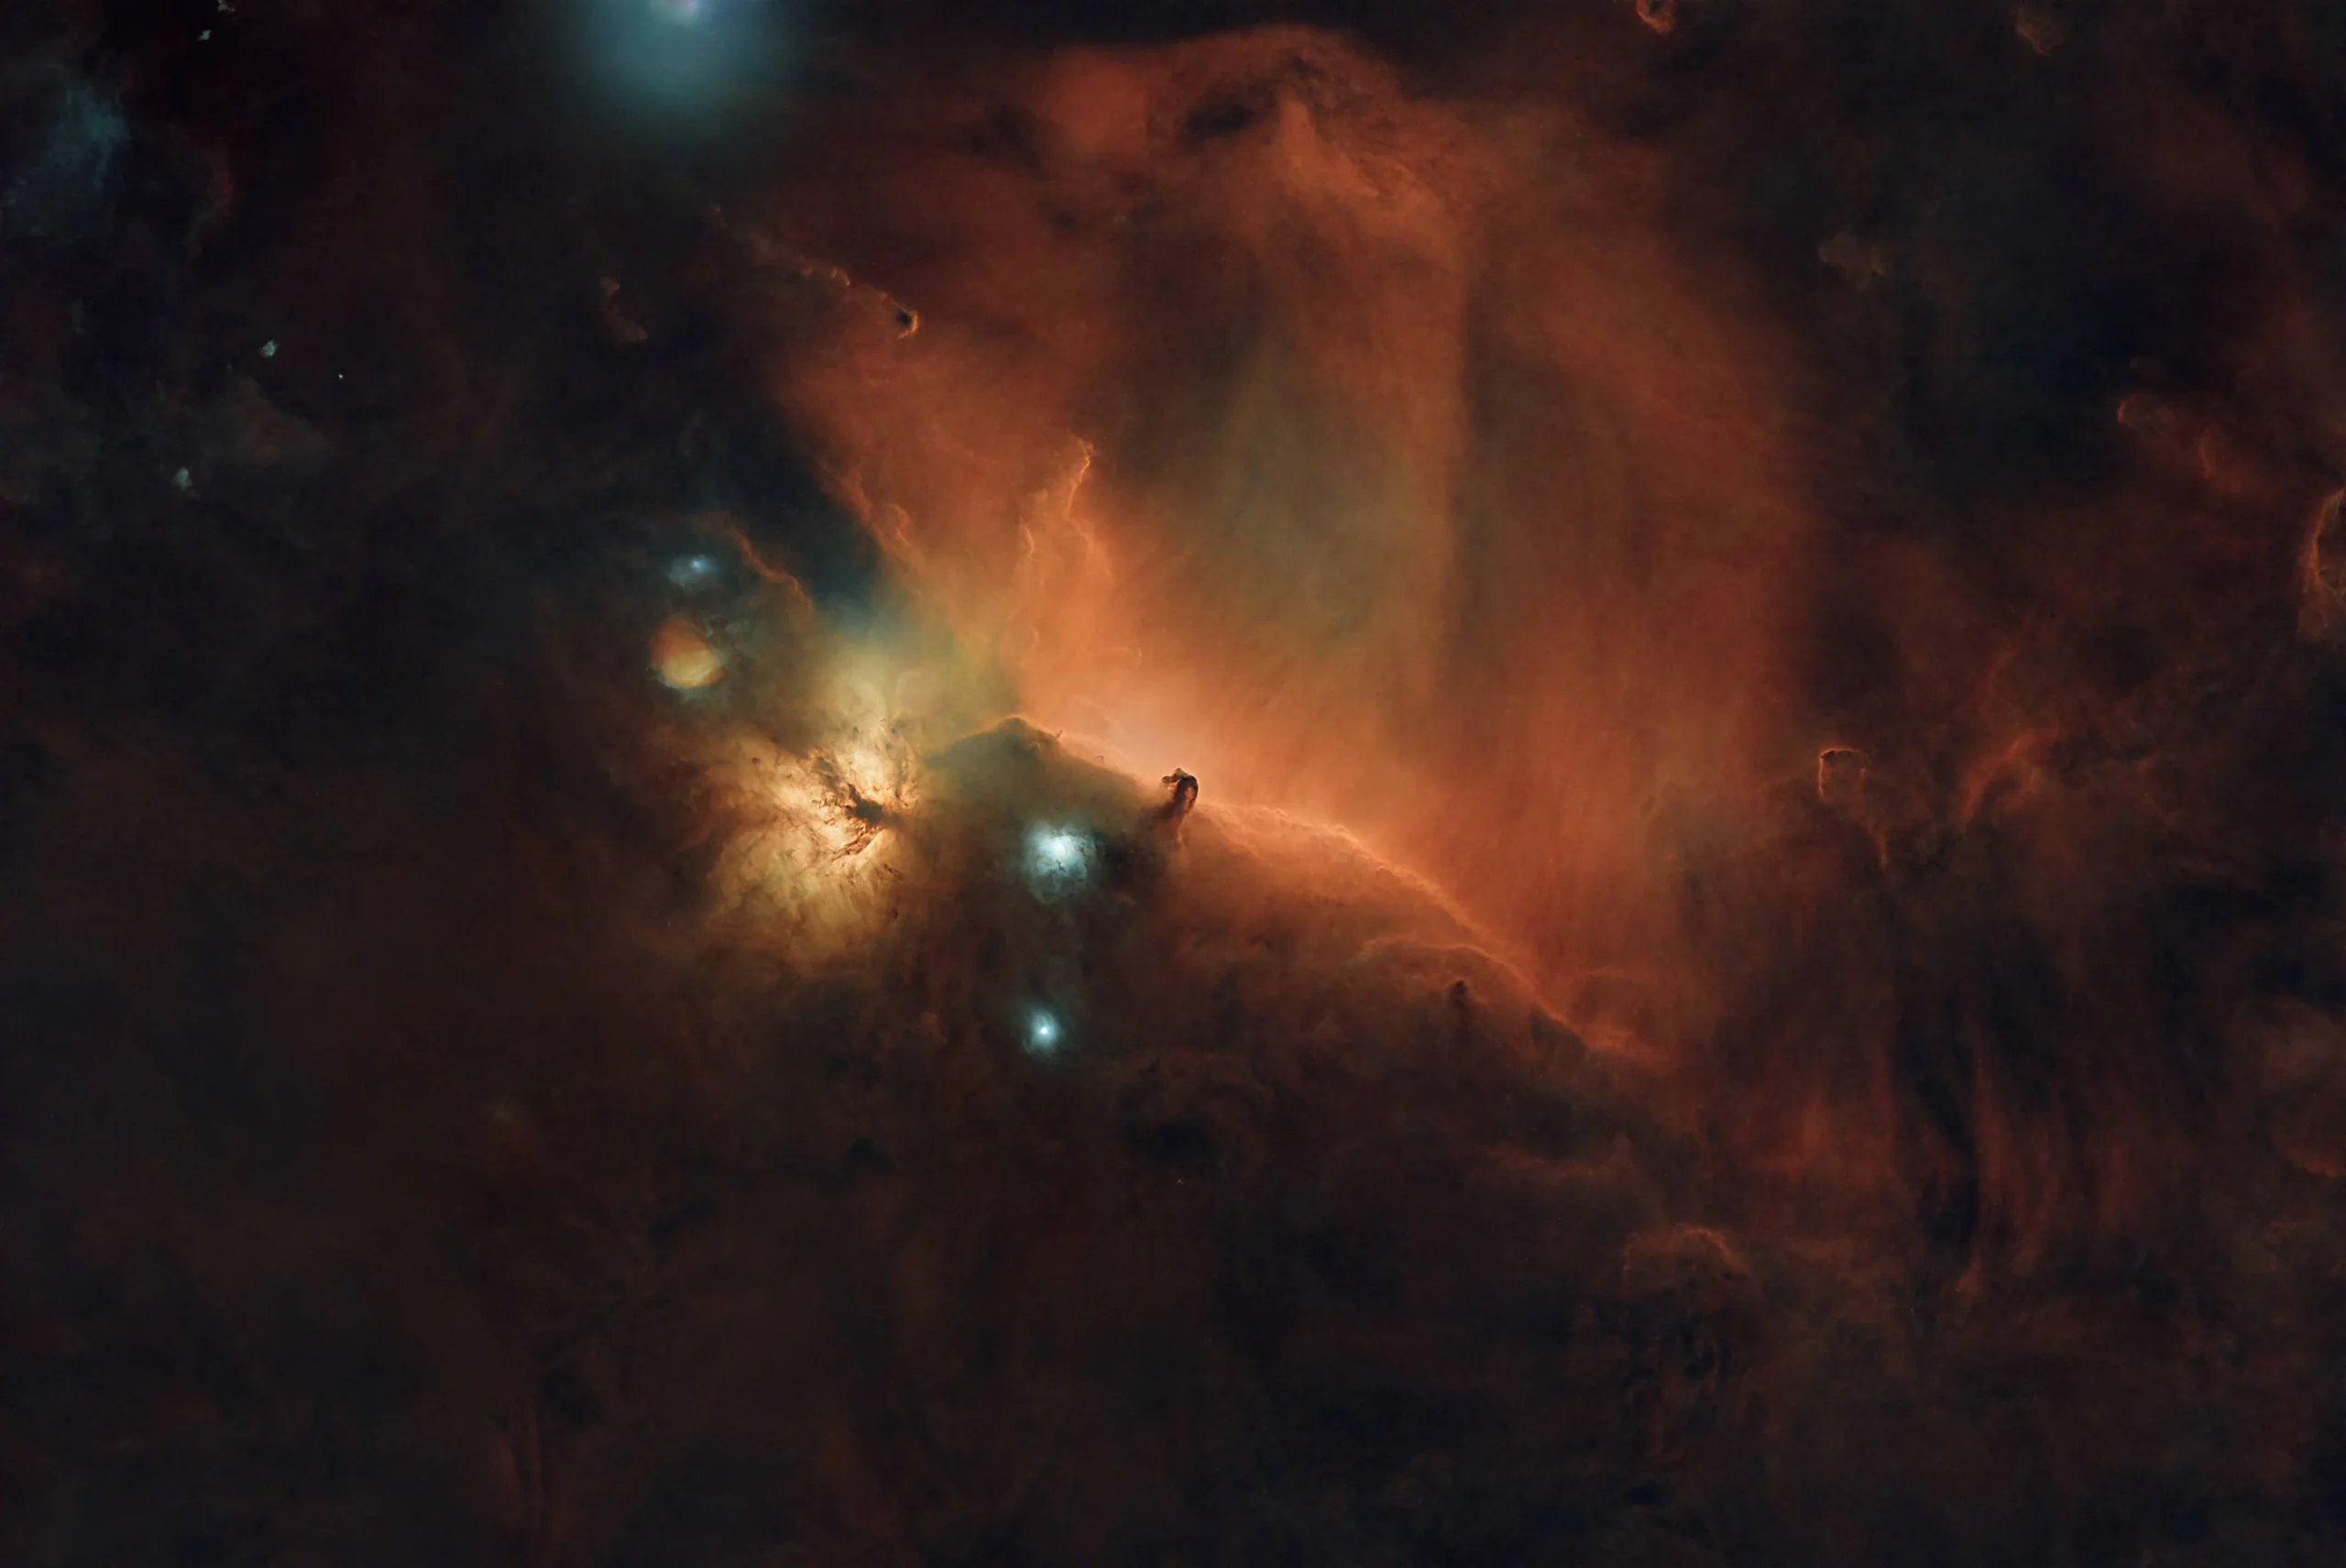
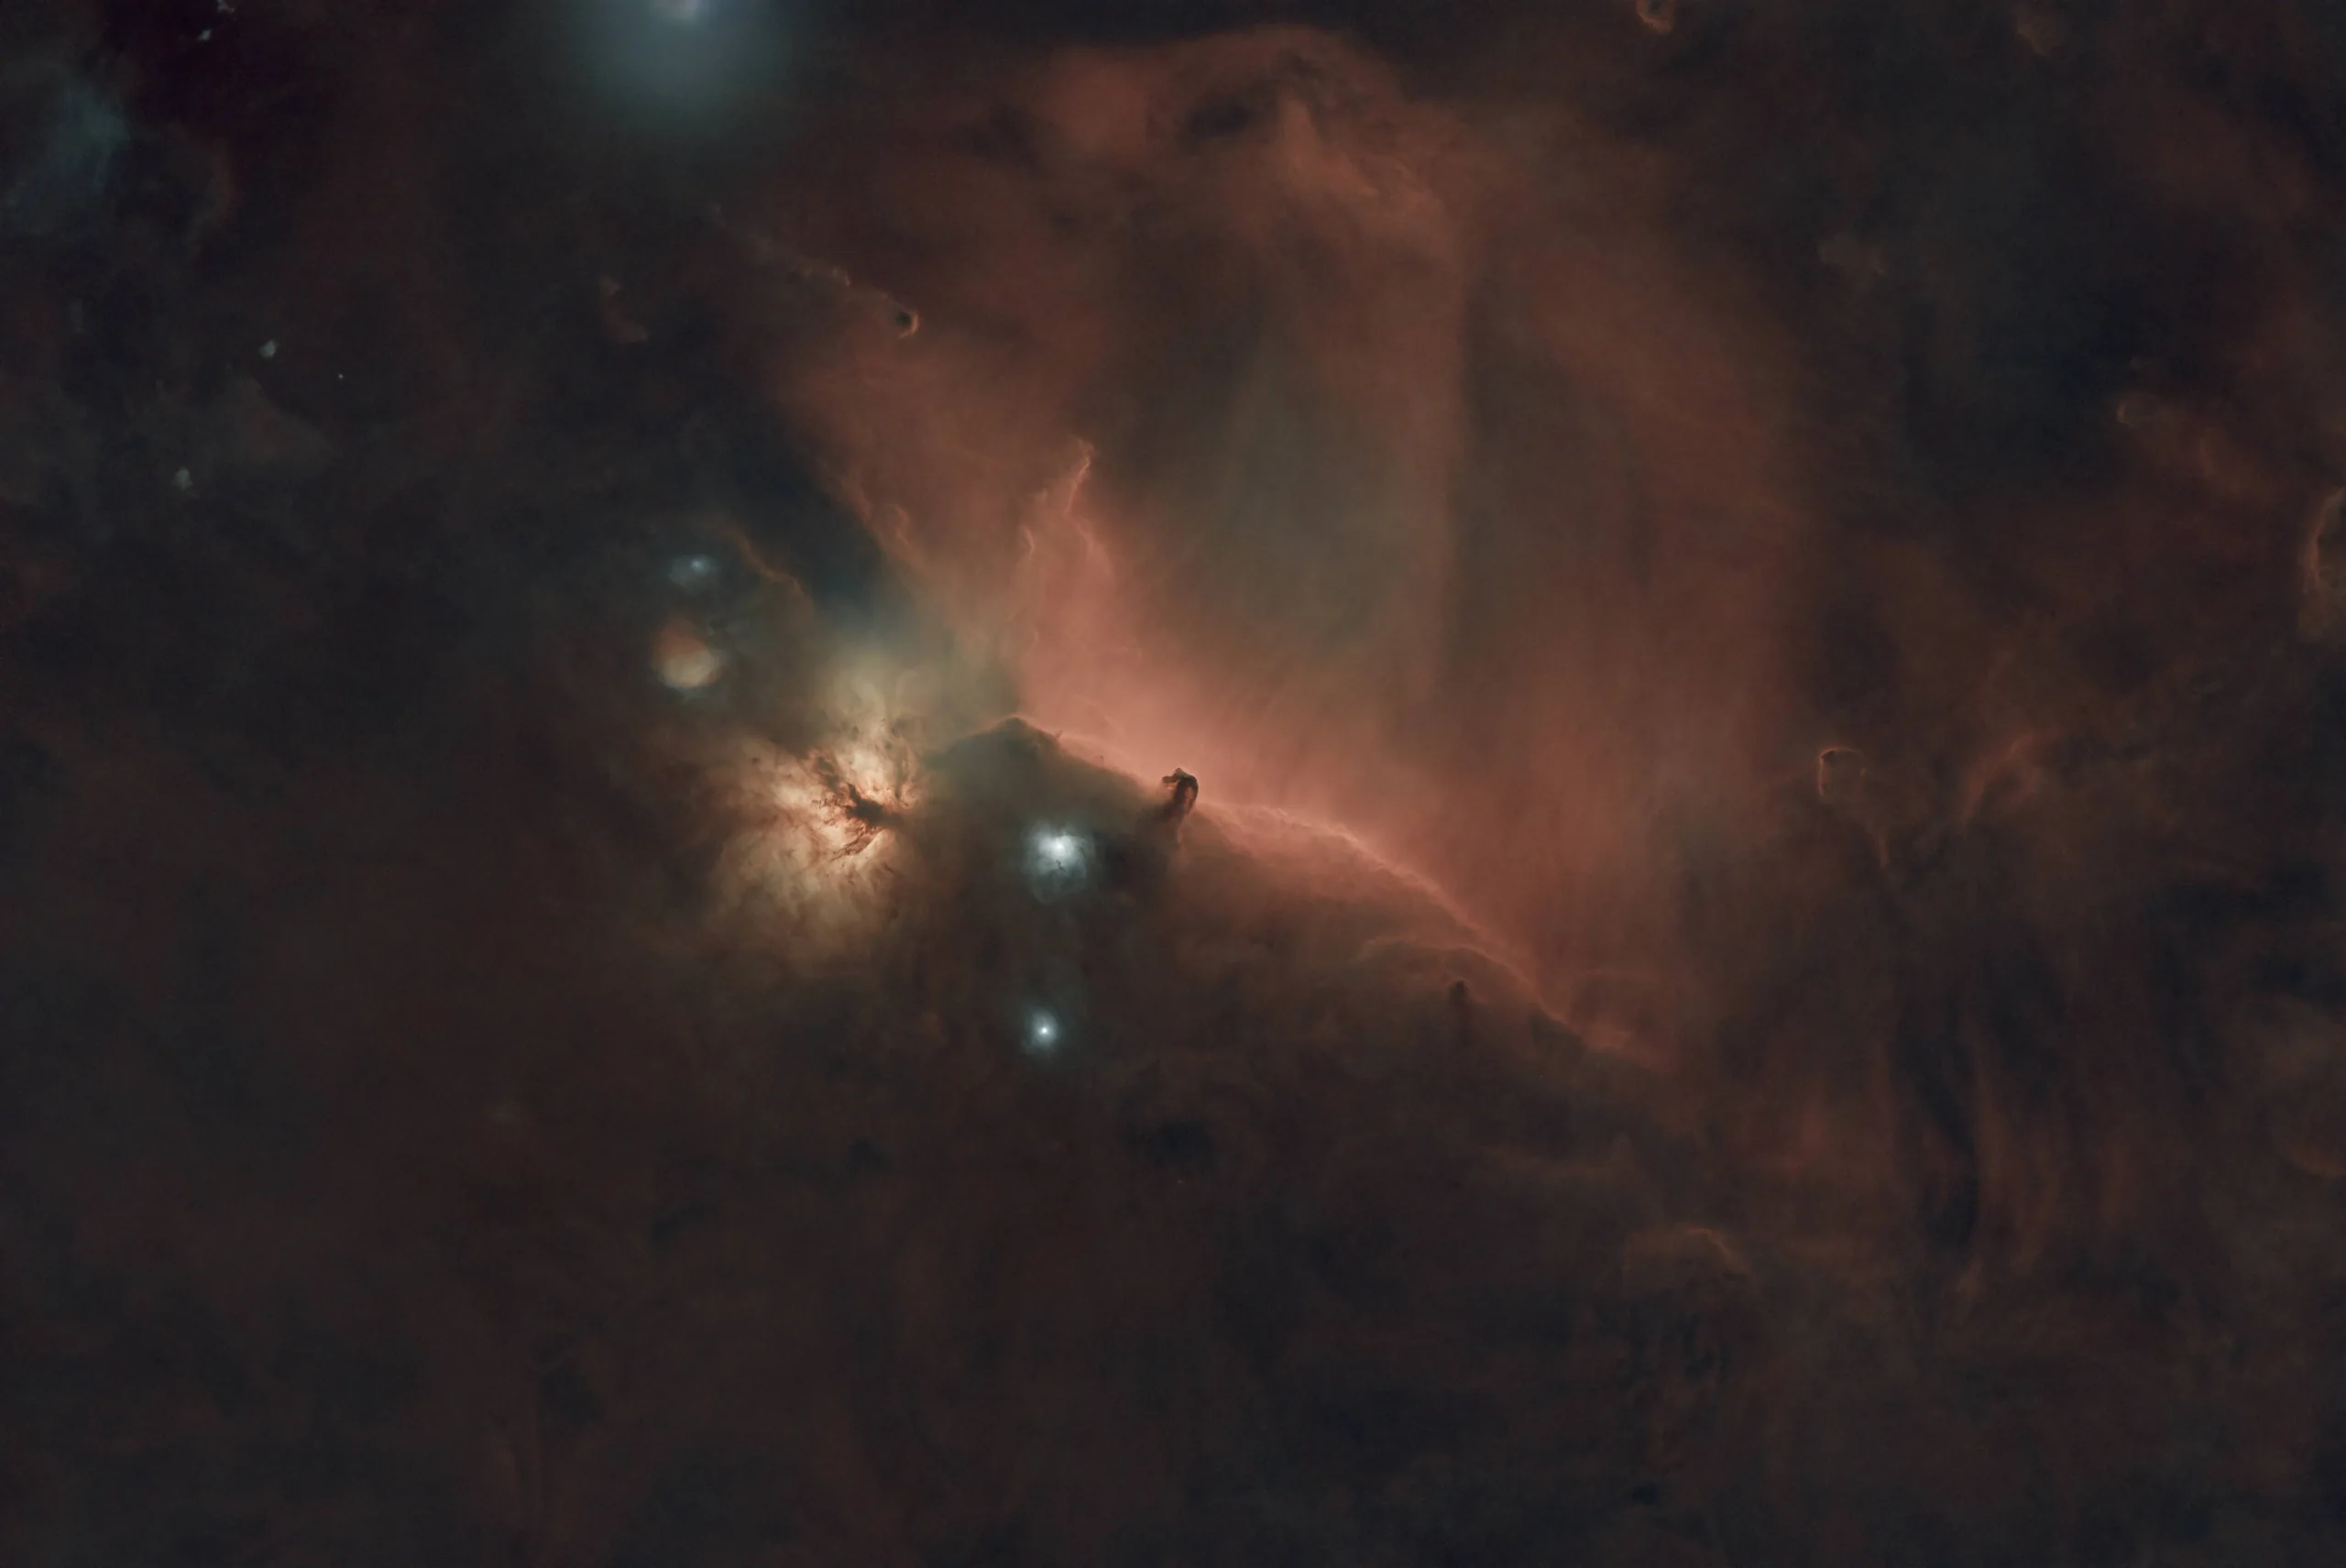
The final major step I'll touch on is adjusting contrast, saturation, and applying a bit more targeted stretching. This stage is less about technical correction and more about artistic intent. I aim to enhance the colors, deepen the depth of the background sky, and draw out more midrange detail - all while preserving a natural, balanced look. It's easy to go overboard here, so I always start with subtle changes and gradually build toward a final version.
I typically begin with Curves Transformation in PixInsight to adjust overall contrast and saturation. At this point, I'm still working on a starless image, which allows me to target specific features without affecting star brightness or color. This makes it easier to enhance elements like the deep reds of an emission nebula or the soft blues in reflection regions - for example, just below and to the left of the Horsehead Nebula, where starlight reflects off surrounding gas and dust. I often use masks at this stage to focus edits on particular areas without over-manipulating the background sky.
Subtle adjustments make a big difference. A small contrast boost in the midtones can reveal new layers of depth, while a gentle increase in saturation brings color gradients to life without feeling forced. I try to strike a careful balance - creating an image that feels rich and vivid, but never artificial.
This step often involves iteration. I'll step away, come back with fresh eyes, and make additional refinements until it feels just right.
 BeforeAfter
Additional Refinements
Beyond the core steps, there are a number of additional tools I use from time to time for fine-tuning. These include wavelet-based enhancements to bring out texture and structure, local contrast adjustments to deepen visual impact, and occasional use of HDRMultiscaleTransform (HDRMT) to manage dynamic range in bright cores or busy star fields.
These tools aren't part of my standard workflow for every image - I use them selectively, depending on the target and how the data responds. Sometimes they add just the right finishing touch, and other times, a more minimal approach works better.
I'll cover these techniques in more detail in blog posts where I break down specific images and walk through the decisions I made during processing. Each target tells a different story, and these tools give me more options when I need them.
Recombining Stars and Reducing Star Size
Once both the starless and stars-only images are fully processed, I recombine them using PixelMath in PixInsight. This gives me complete control over how the stars are reintroduced - whether at full strength, slightly reduced, or softly blended for a more balanced look. Sometimes I'll apply a slight star reduction before recombining, especially if the stars are distracting or overly dominant.
PixelMath makes this step both precise and flexible. I can scale star brightness, control blending ratios, and make sure the final image has the visual balance I'm after - all without degrading detail in the nebula or background structures.
With the full image assembled, I perform a final crop to clean up the edges. This trims out stacking artifacts or alignment mismatches that can appear along the borders. I also take this opportunity to fine-tune the composition - centering the target or adjusting the framing slightly to draw the eye more effectively.
 PrePost
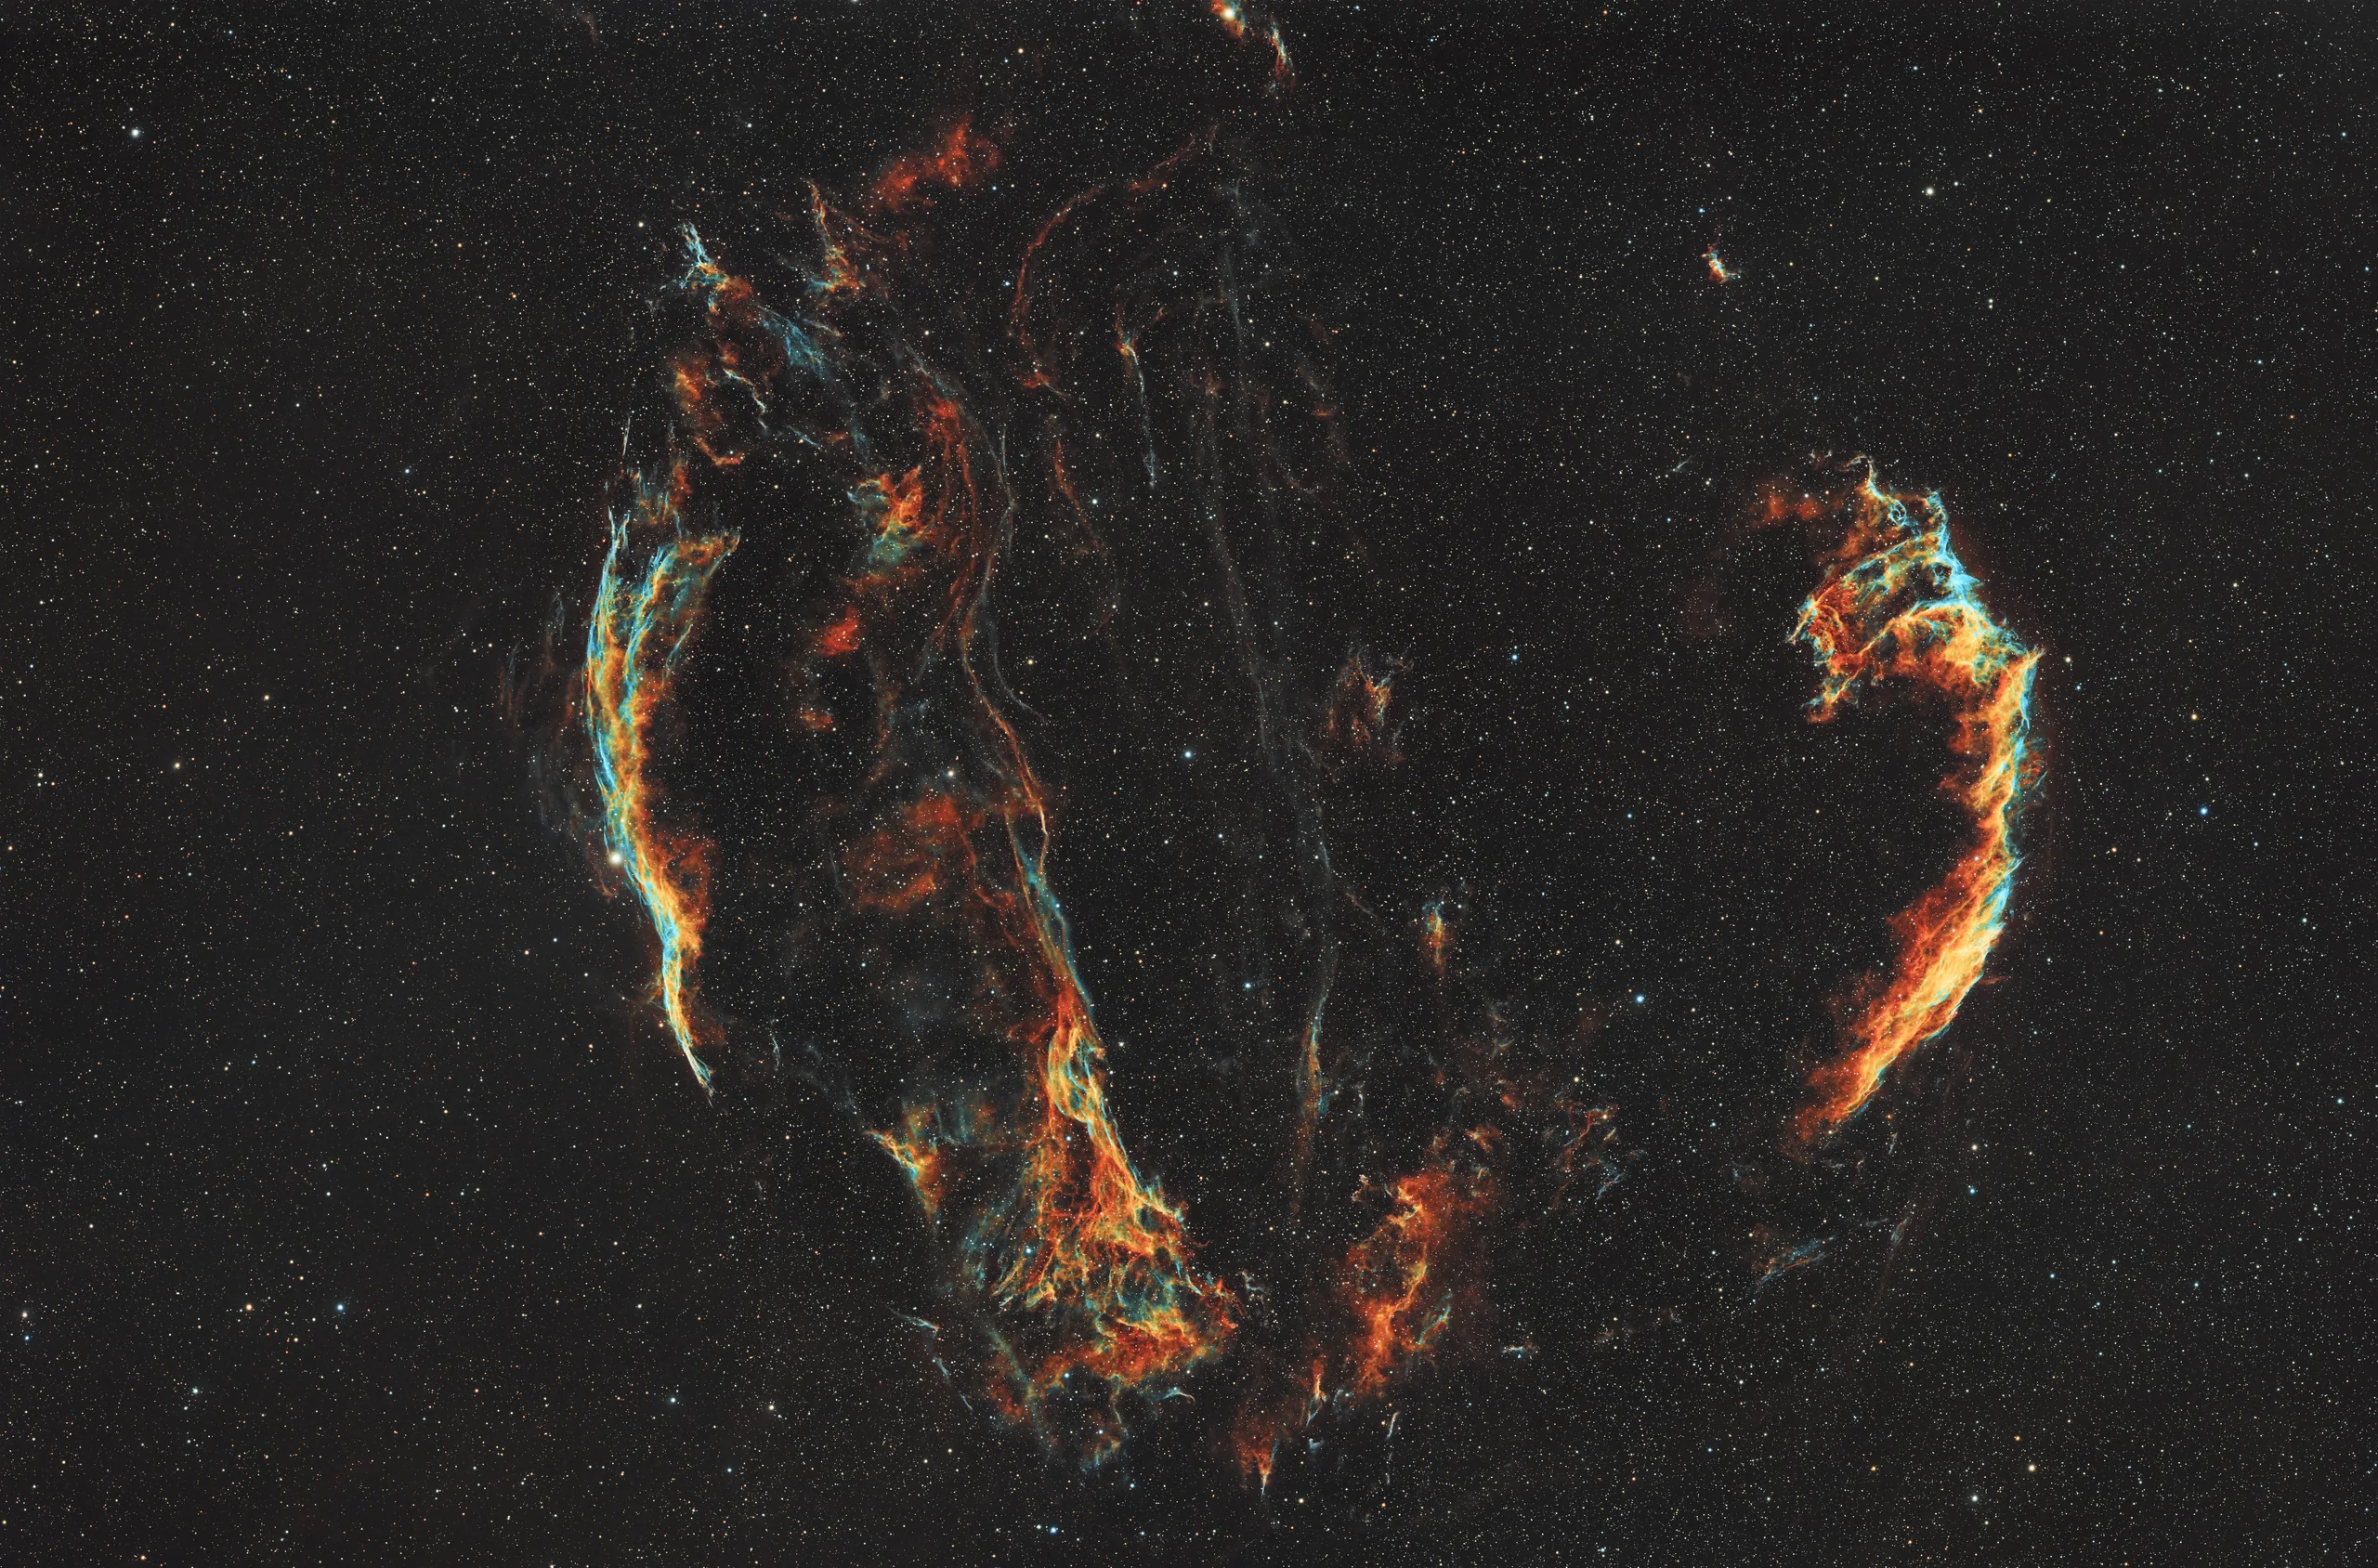
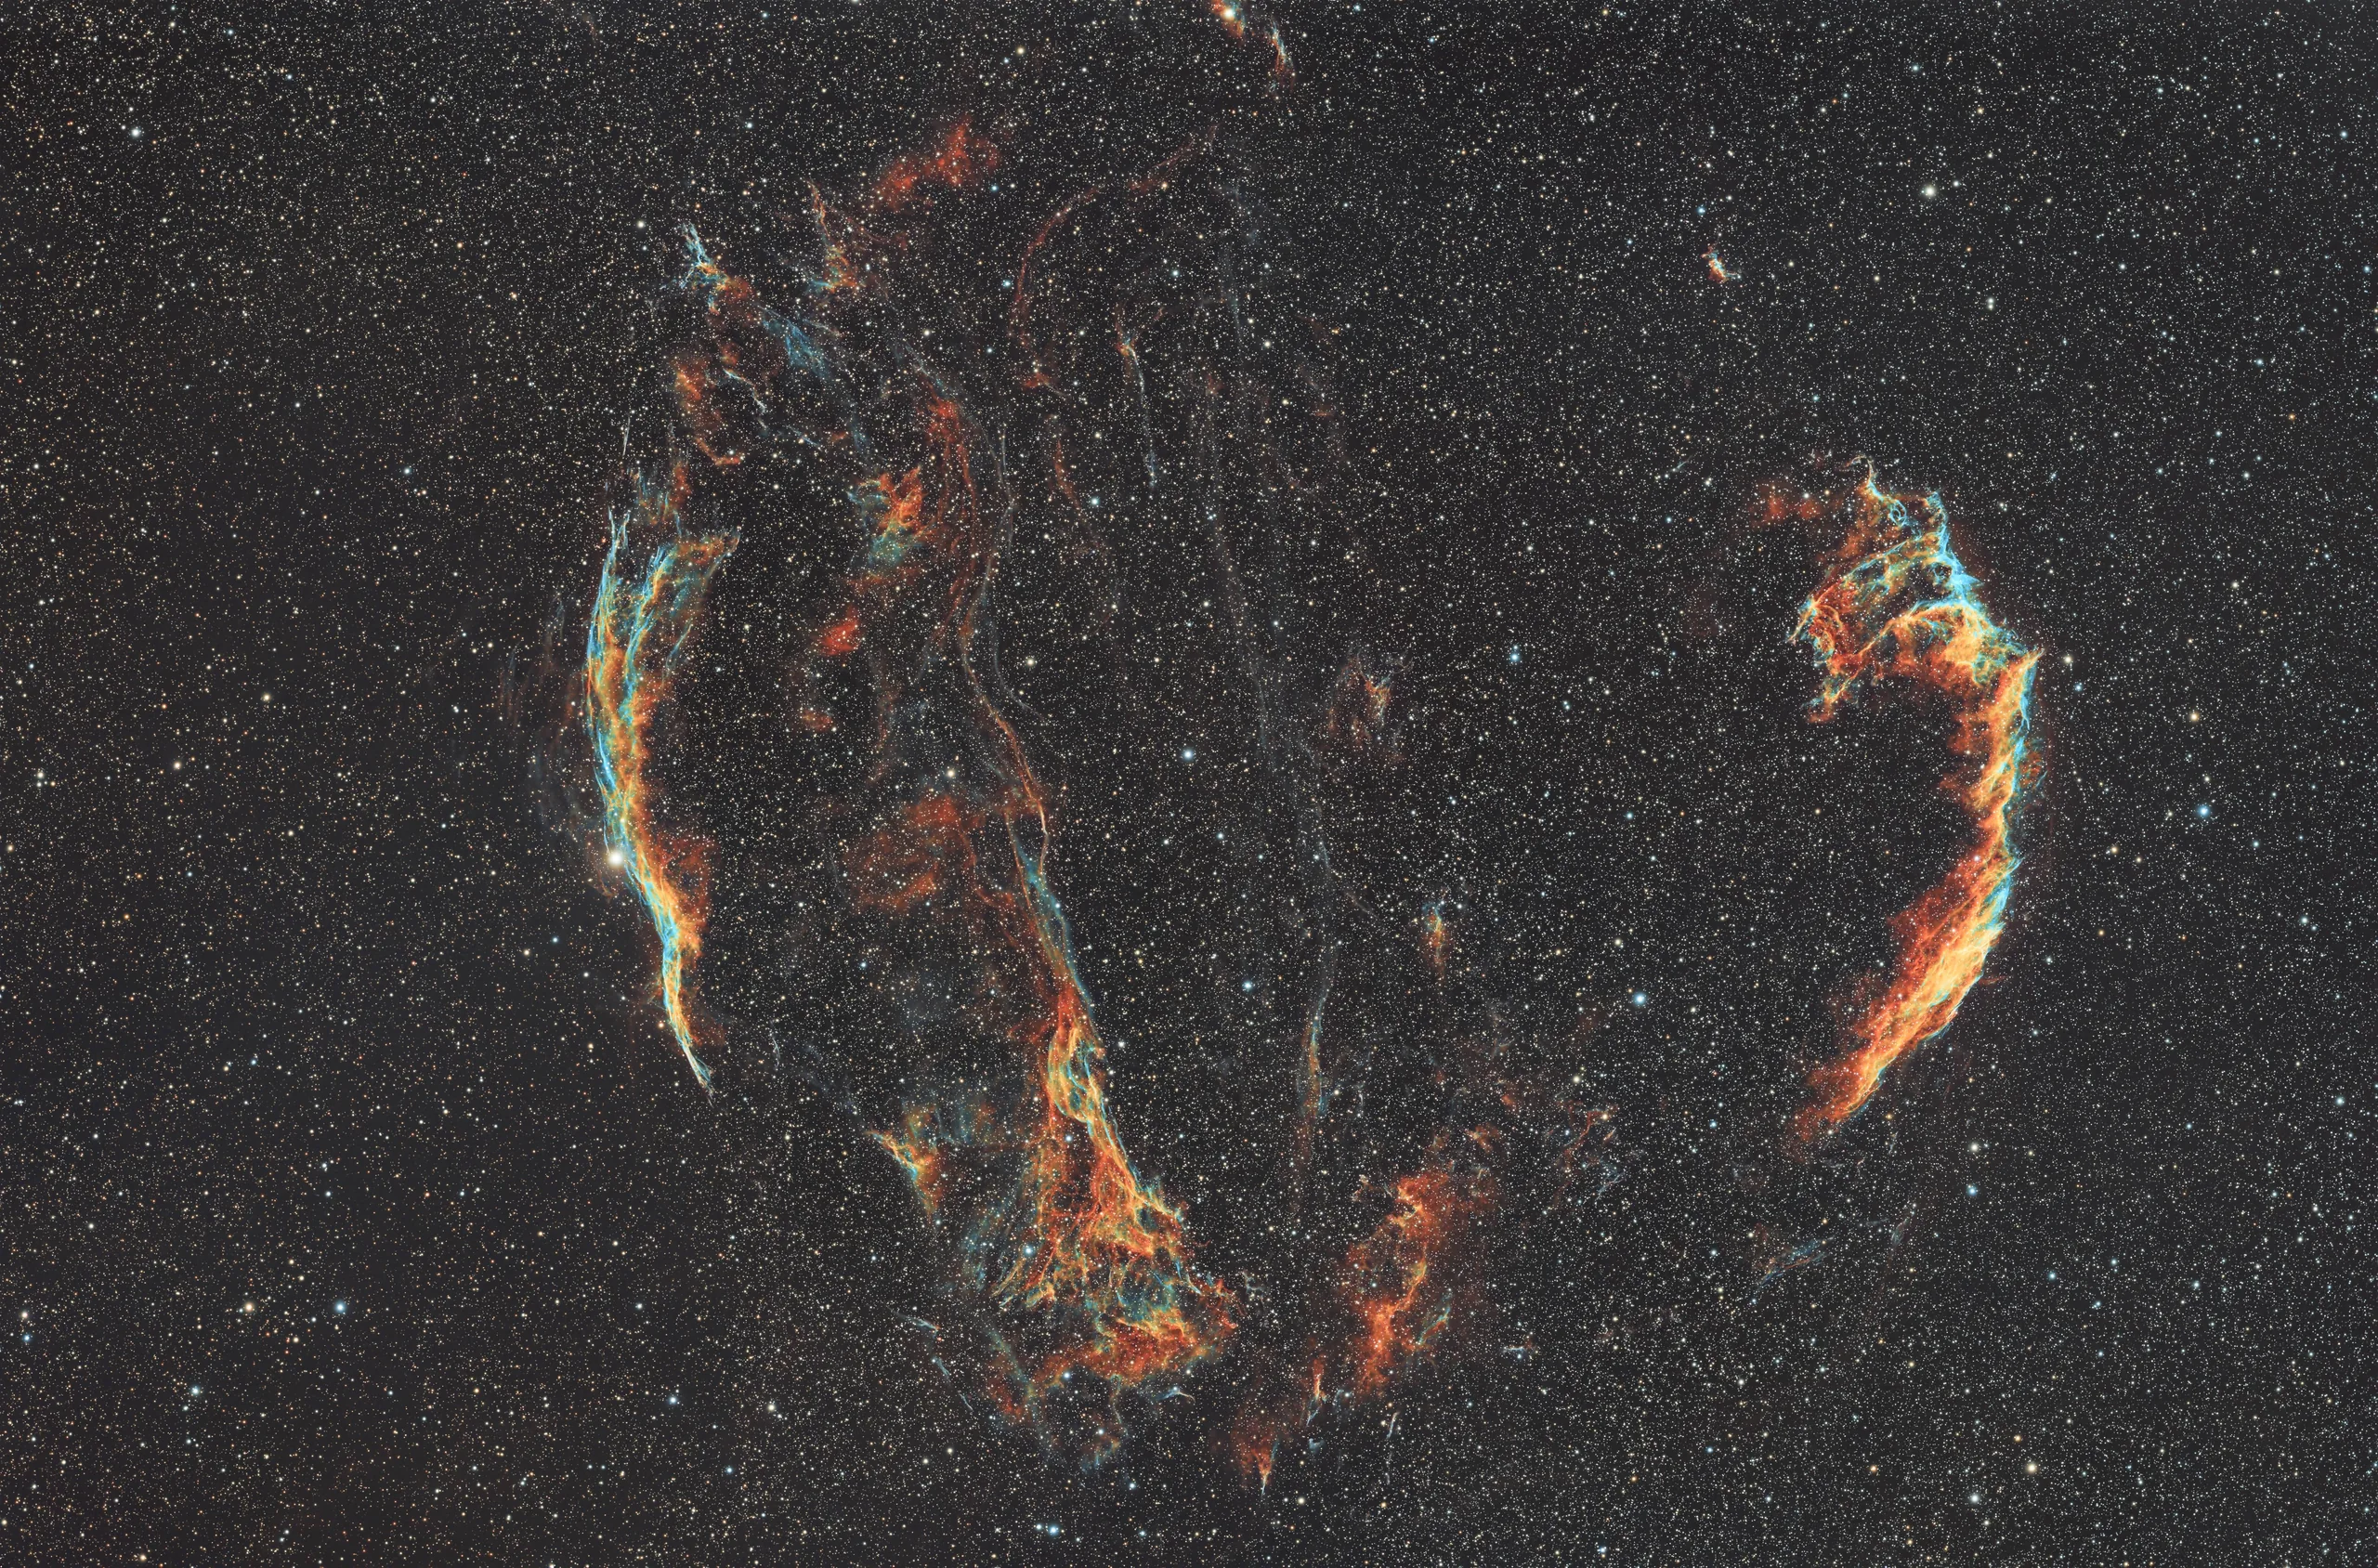
The Horsehead Nebula didn't require much star reduction - the stars in that field are naturally sparse and subdued. To better illustrate the impact of star control, I've included an example from the Veil Nebula, where the star field is much denser. In the second image, you'll notice how the nebula stands out more clearly, the background appears darker, and the colors have more visual impact. Importantly, the nebula itself is unchanged between the two versions - the brightness, contrast, and color of the target are identical.
The key difference is in how the stars were handled. In the improved version, I simply stretched the stars less. Because stars are often much brighter than the surrounding nebula, they can quickly become overblown during processing. By under-stretching the stars-only layer - or applying gentle star reduction techniques - I can prevent them from overwhelming the frame and help the nebula emerge with better clarity and balance.
Final Touch-ups and Cropping
The final step is cropping. I use this not just to remove stacking artifacts or framing misalignments, but also to refine the composition. A small crop can help recenter the target or improve balance across the frame, drawing the eye more naturally through the scene.
At this point, the image is complete, at least for now. I may revisit the data as my tools and techniques improve, but this version is ready to share, print, and enjoy.